
Chapter Clustering
After Head Detection, every face found in a chapter starts as a separate thumbnail. Chapter Clustering sorts those faces into groups so that each character in a chapter has their own cluster.
Process one chapter at a time in the Chapters tab before moving to Characters which is project wide. A character’s appearance can change between chapters due to power-ups, injuries, time skips, or reincarnation. Sorting faces chapter by chapter helps keep these different appearances organized and makes character matching more accurate.
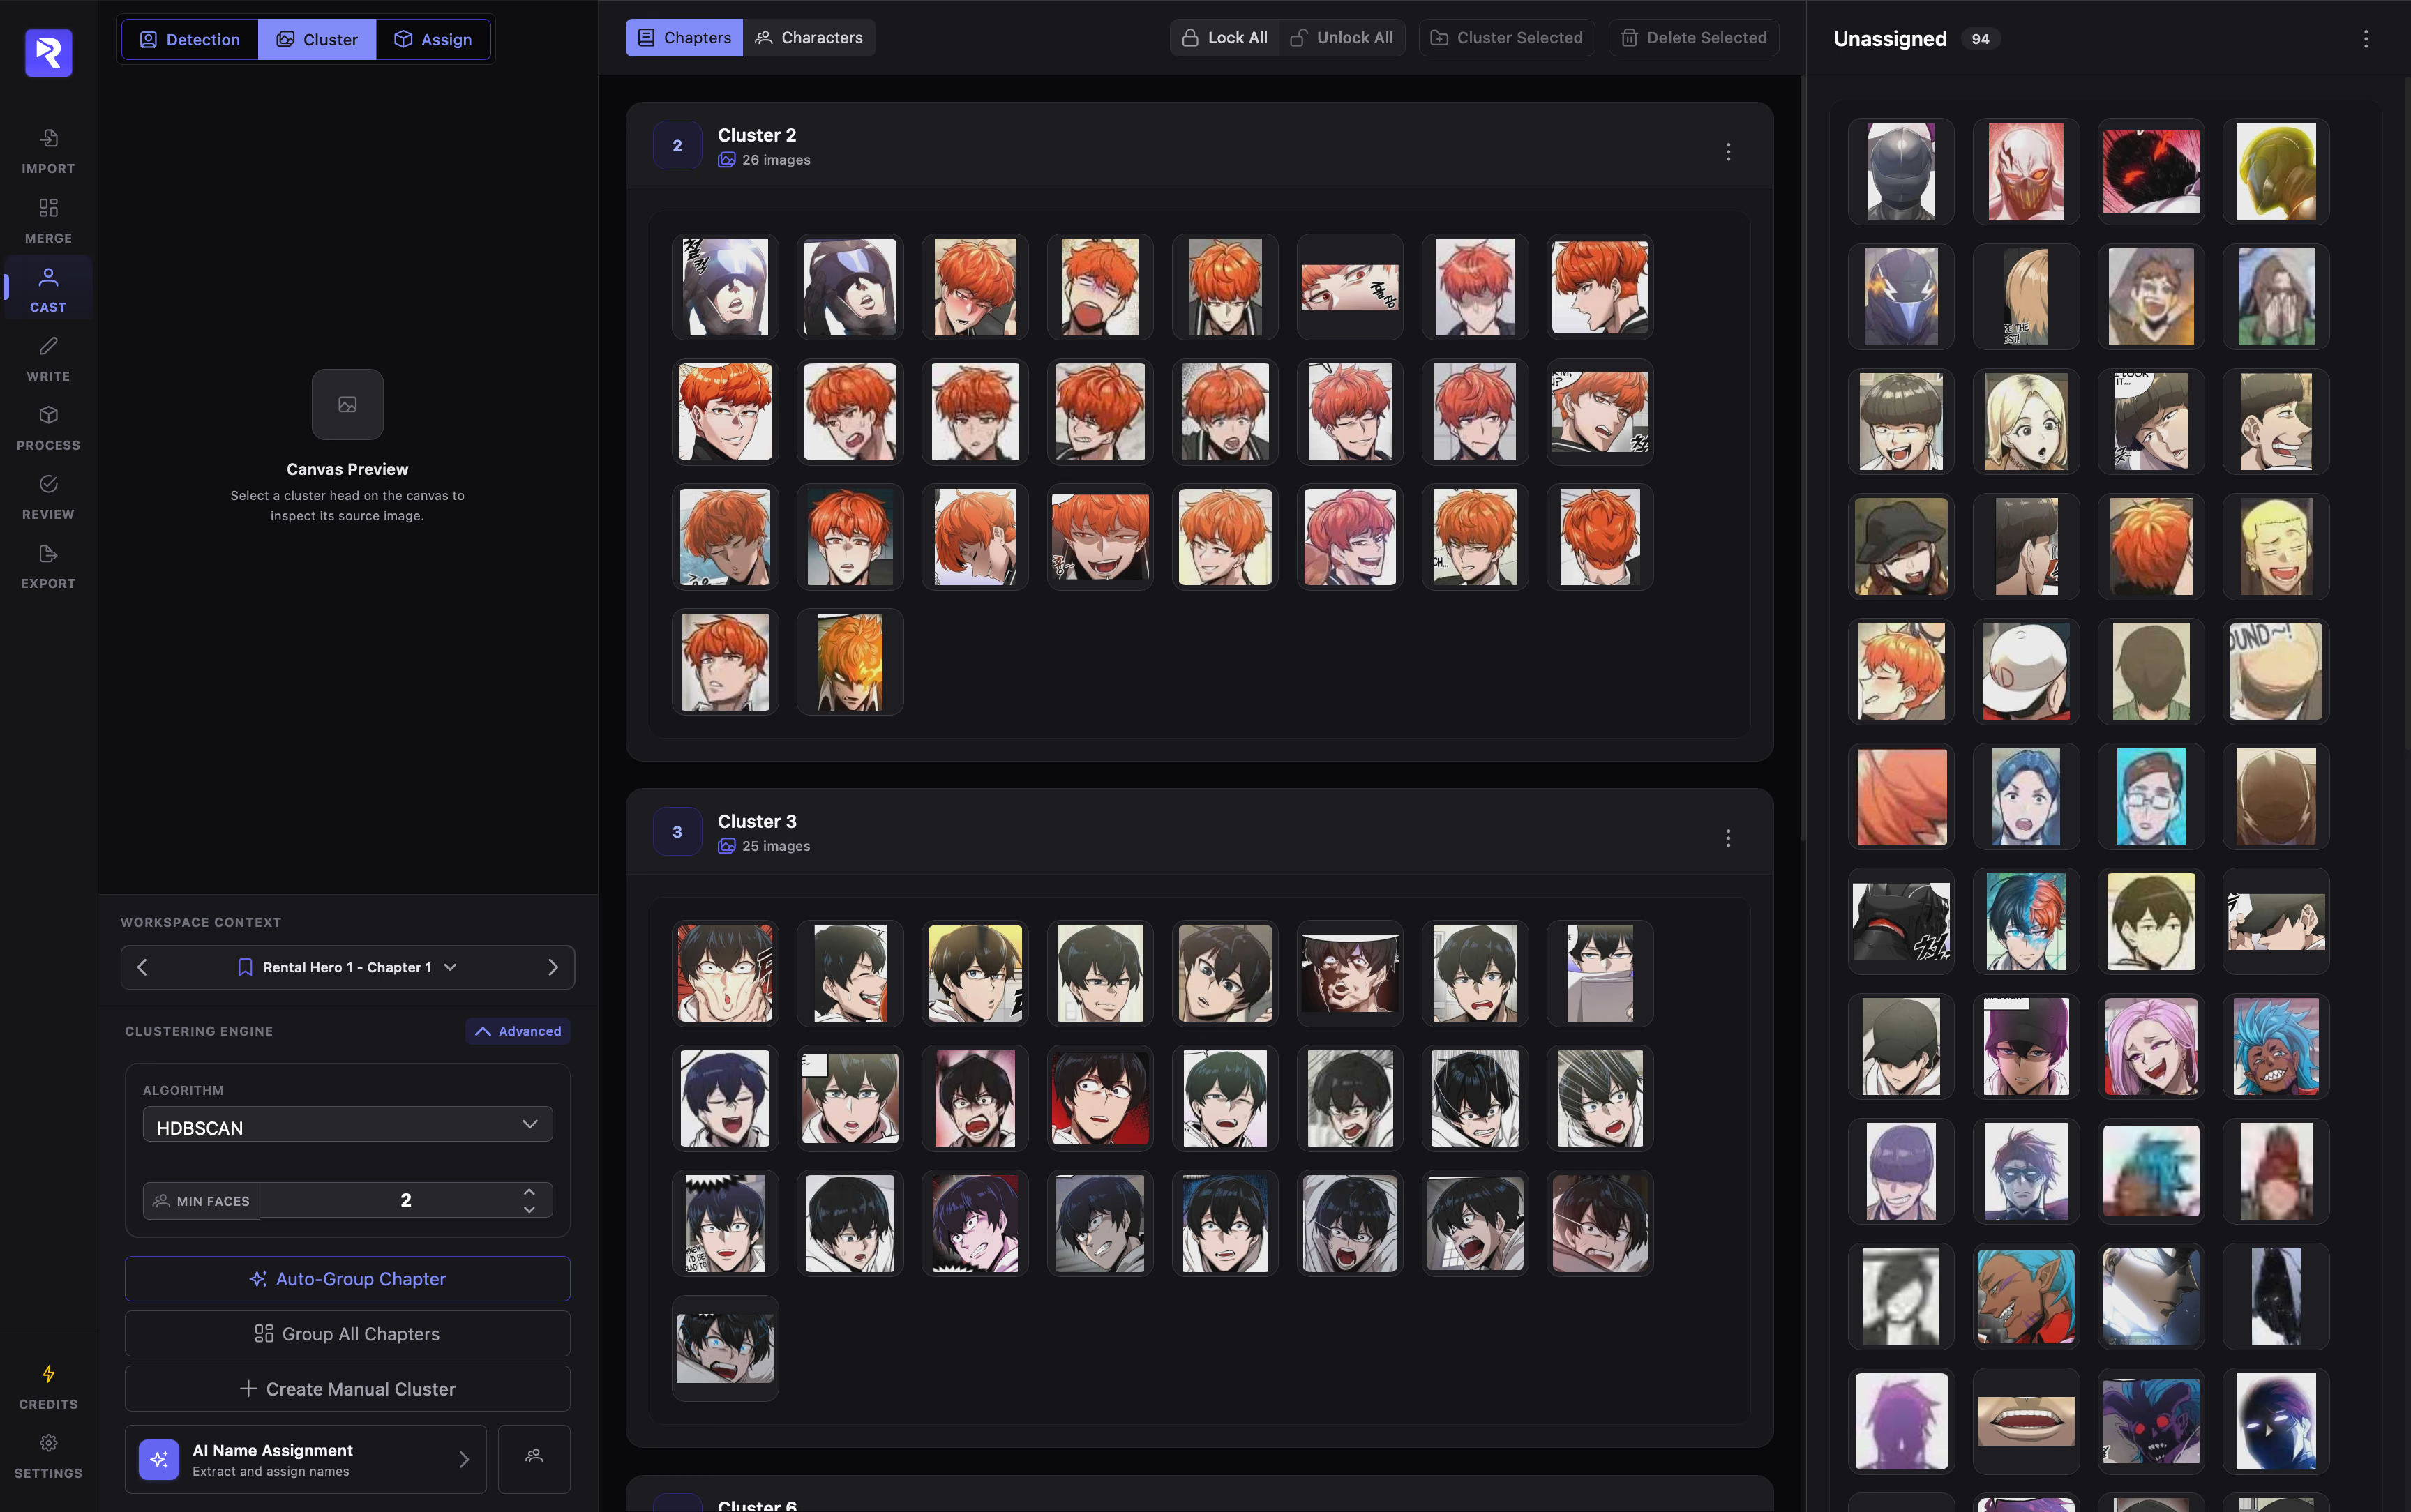
Preview faces on their source page, switch chapters, and run AI or manual clustering tools.
View, lock, merge, and organize the character clusters detected in the active chapter.
Holds faces that did not match any cluster yet so you can drag them into a group or delete them.
1. Navigate Chapters & Group Faces Automatically
Section titled “1. Navigate Chapters & Group Faces Automatically”Use the Workspace controller in the left sidebar to move between chapters—click the < and > arrows to step forward or backward, or click the chapter name to pick any chapter from the list.
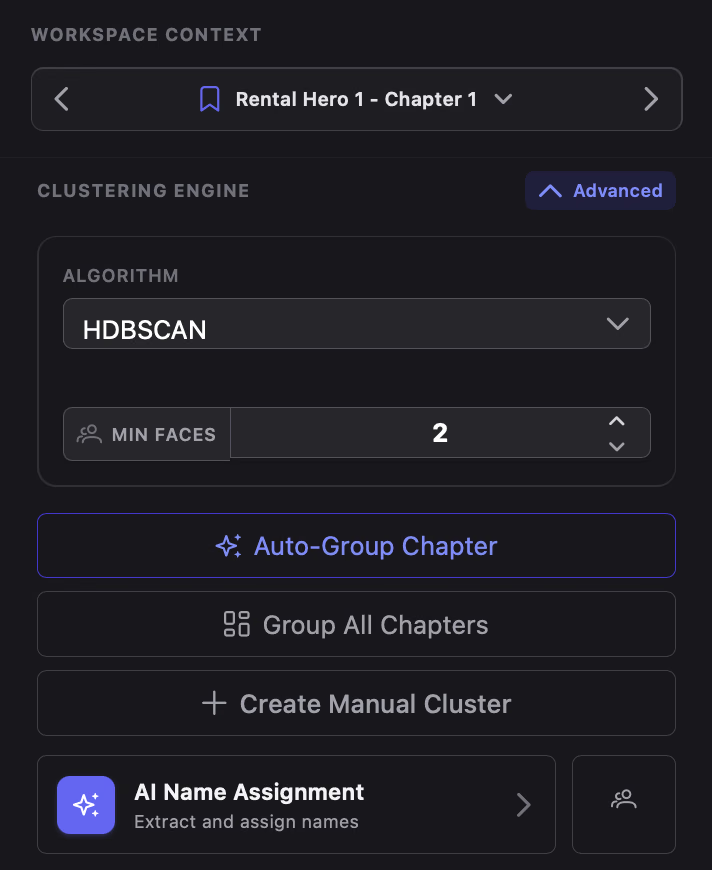
From the Clustering Engine section in the workspace, you can perform three main actions:
Groups all unlocked faces in the chapter you currently have open.
Runs chapter grouping on every chapter in your project, one after another. Each chapter still keeps its own separate clusters.
Adds an empty named cluster to the active chapter so you can drag faces into it by hand.
- Where unsure faces go: Any face that does not clearly match a group is placed in Unassigned on the right so you can sort it yourself.
- Stopping early: You can cancel a run at any time. If you stop while a chapter is still in progress, that chapter reverts cleanly so nothing is left half-sorted.
- Quick shortcuts at the bottom: The bottom of the sidebar also gives you direct buttons to open the Character Manager (users icon) or move forward to name assignment
2. Check Who a Face Belongs To
Section titled “2. Check Who a Face Belongs To”Because cropped thumbnails can look similar out of context, you can check any face on its original page before moving it.
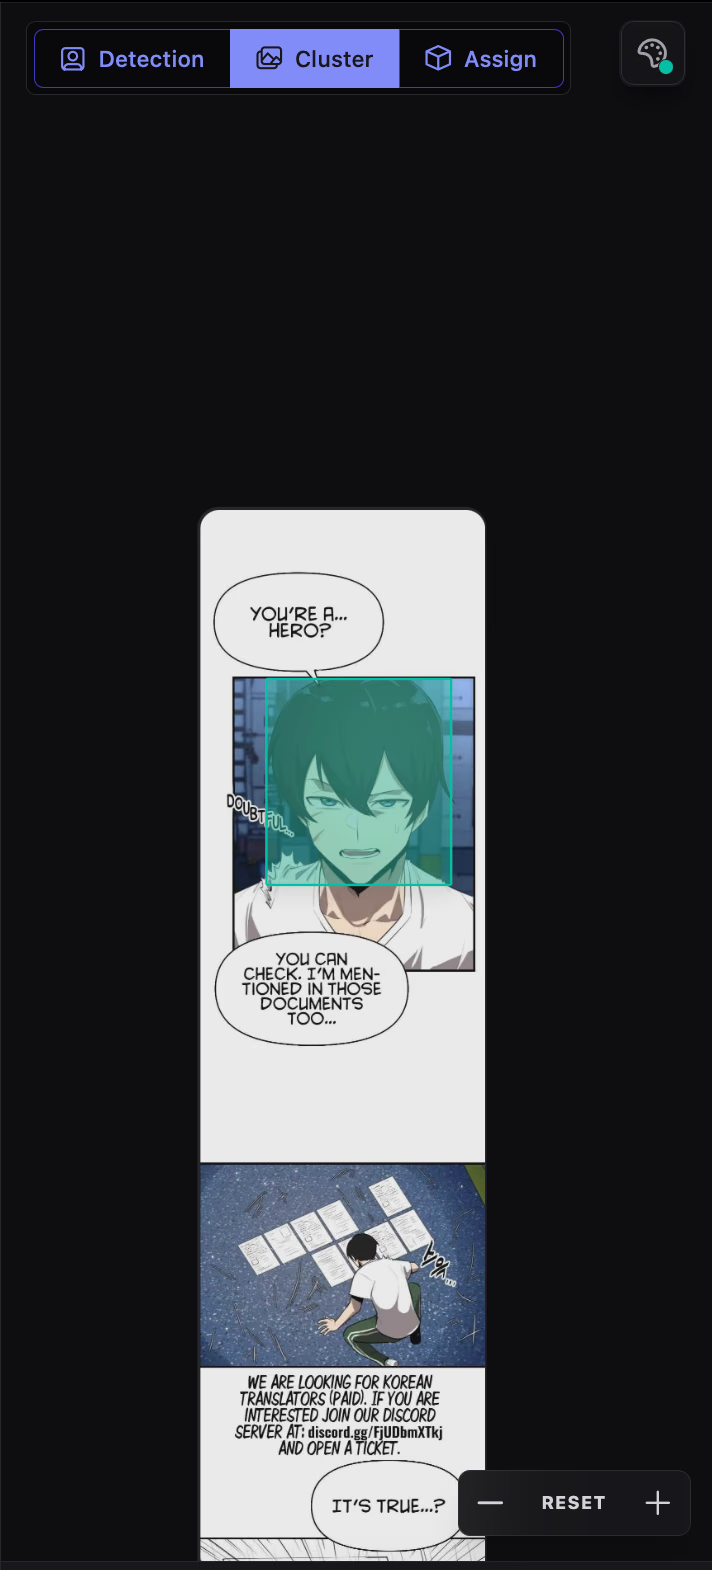
- Inspect in context: Click any face thumbnail in a cluster or in Unassigned to open its source page in the Canvas Preview at the top left, with a box drawn around that face.
- Move around the page: Scroll to zoom in or out, drag the image to pan, or use -, Reset, and + at the bottom right of the preview.
- Adjust the highlight: Click the palette icon in the top-right corner of the preview to toggle Auto-Zoom Head (centers on the selected face automatically) or change the box color, thickness, and fill opacity.
3. Clean Up Clusters by Hand
Section titled “3. Clean Up Clusters by Hand”Finally, use drag-and-drop, multi-select, and the cluster controls to make your final touches. AI can occasionally split one character into two clusters or leave a side-angle face in Unassigned.
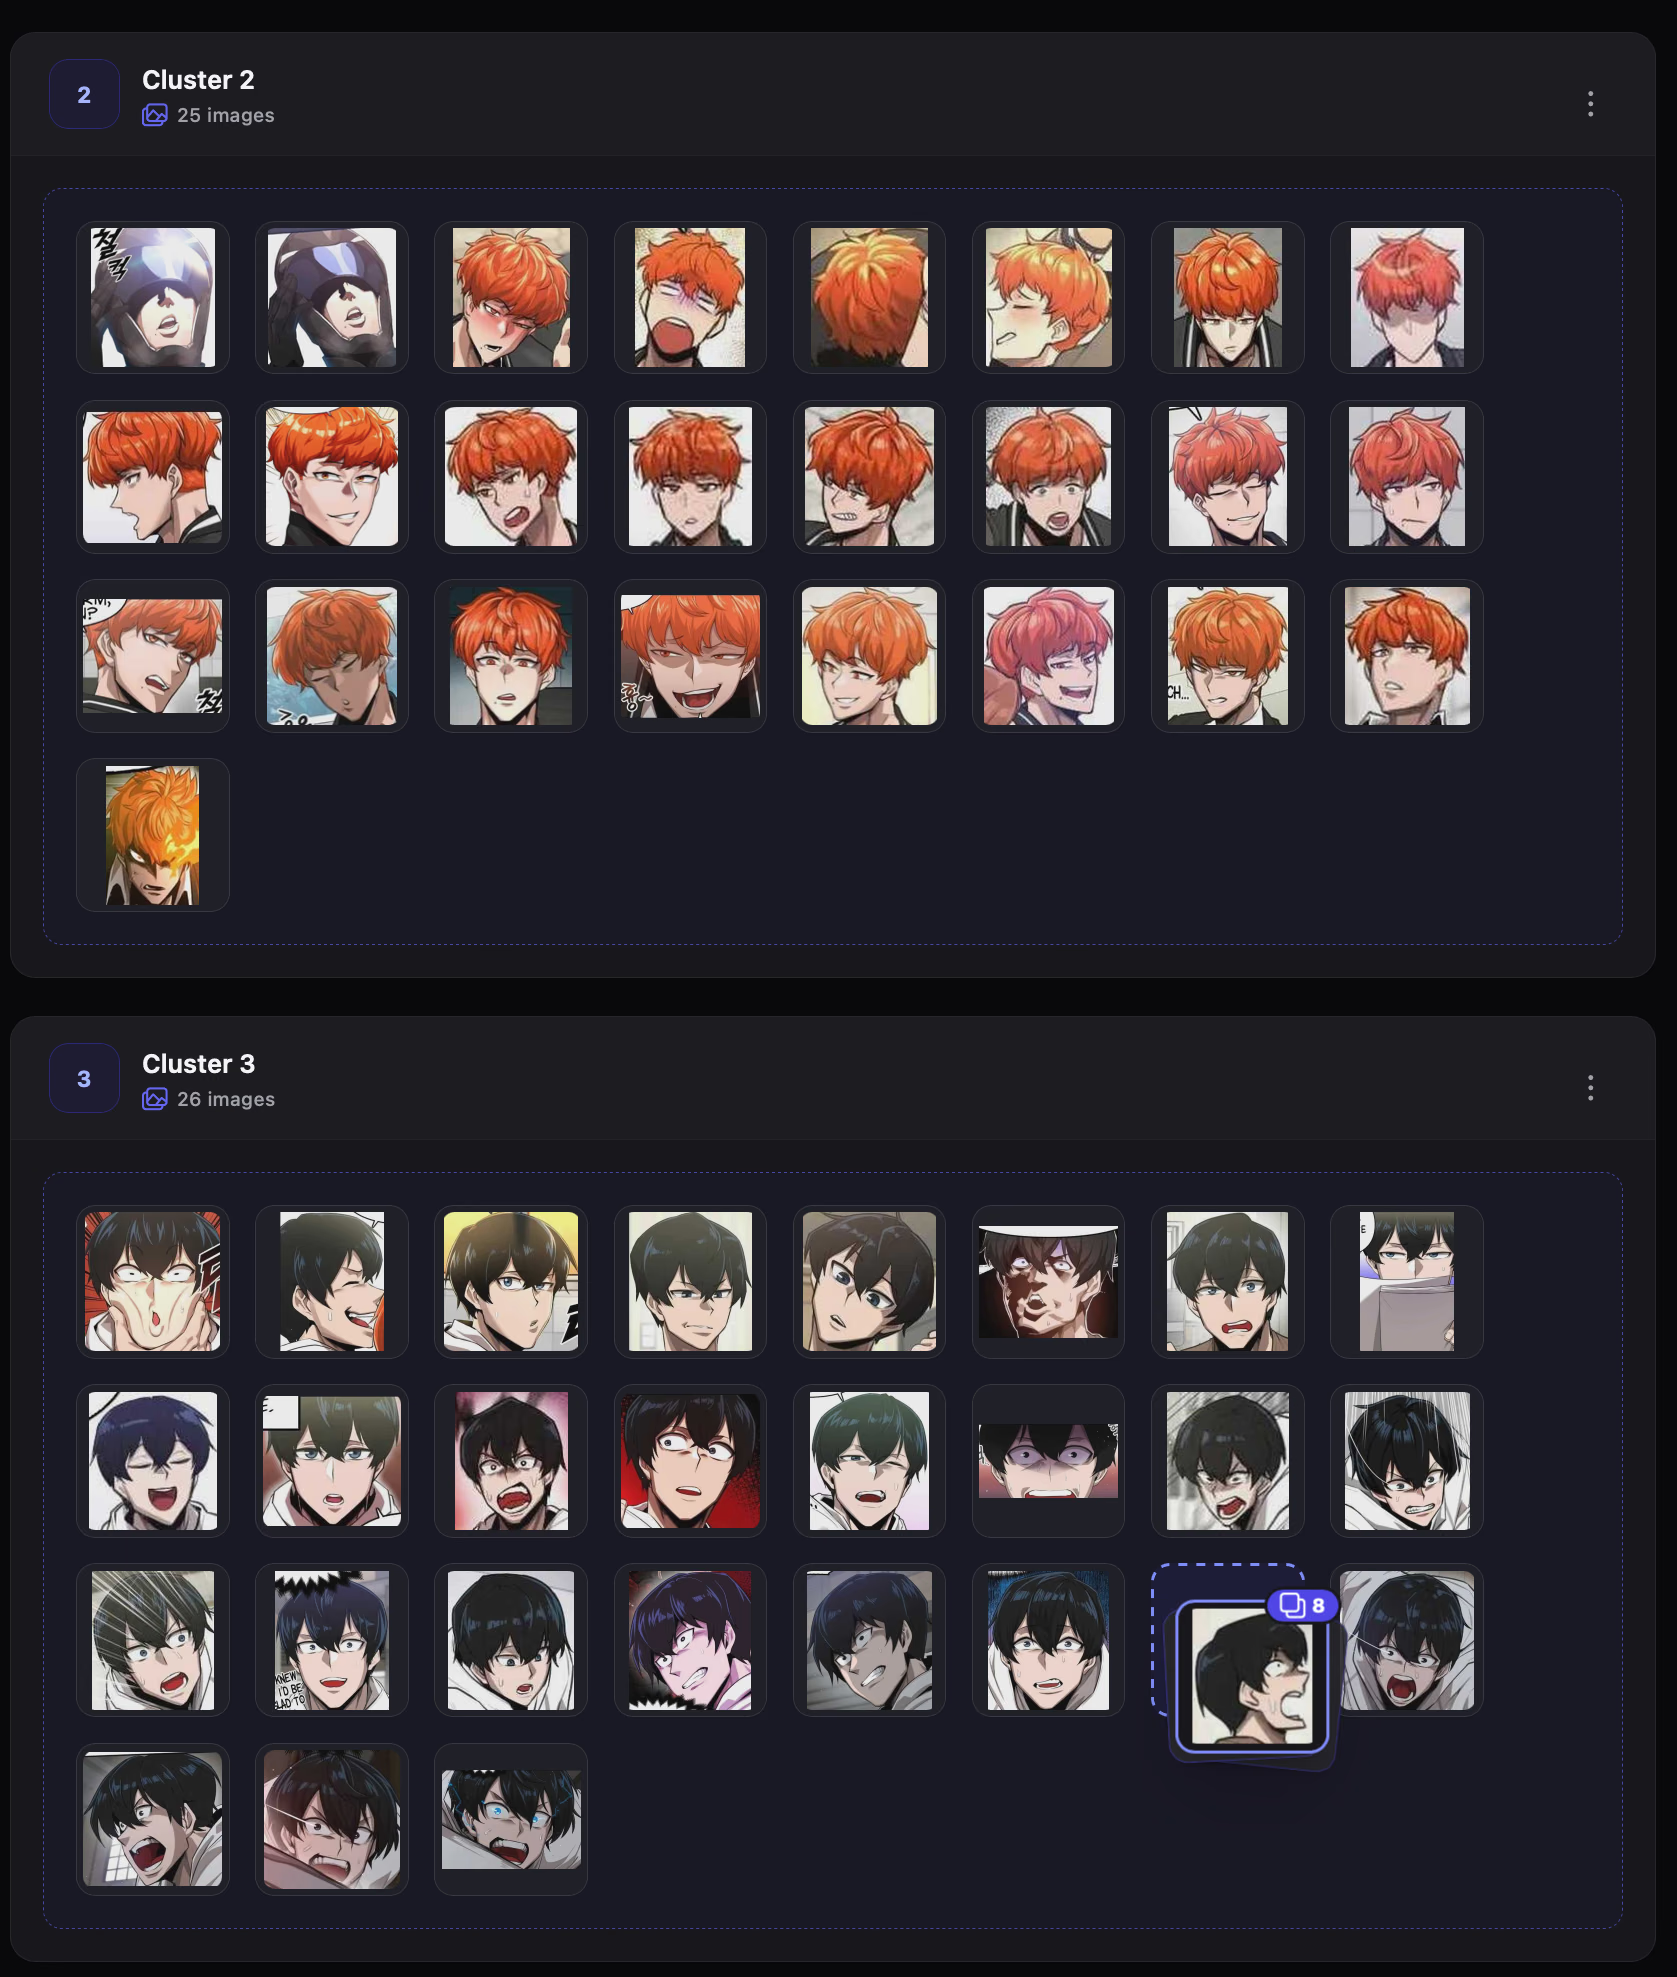
- 1Drag one face or reorder inside a cluster
Drag any face thumbnail into another cluster or over to Unassigned. Moving the last face out of a cluster removes the empty cluster automatically.
- 2Select and move several faces at once
Hover over thumbnails and tick their corner checkboxes. Drag any checked face to move the entire selection together, or use Put Selected Here inside the destination cluster’s ⋮ menu.
- 3Group selected faces into a brand-new cluster
Check faces anywhere (in clusters or Unassigned) and click Cluster Selected in the top toolbar—or New Cluster from Selected in any cluster’s ⋮ menu—to place them into a new standalone cluster.
Lock Clusters to Protect Finished Groups
Section titled “Lock Clusters to Protect Finished Groups”When a cluster is complete and you do not want it changed again, lock it:
- Lock one cluster: Open the cluster’s ⋮ menu and click Lock Cluster (click Unlock Cluster anytime to edit it again).
- Lock or unlock the whole chapter: Use Lock All / Unlock All in the top bar of the center panel.
Cluster & Unassigned Action Menus (⋮)
Section titled “Cluster & Unassigned Action Menus (⋮)”Each cluster card and the Unassigned panel have a ⋮ menu for quick bulk actions:
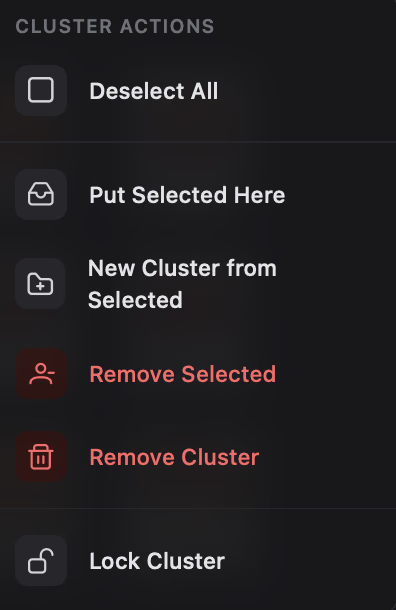
- Select All in Cluster / Deselect All: Check or uncheck every face in this cluster.
- Put Selected Here: Move all currently checked faces into this cluster.
- New Cluster from Selected: Create a new cluster from all checked faces.
- Remove Selected: Delete only the checked faces inside this cluster.
- Remove Cluster: Delete this cluster and all faces inside it.
- Lock / Unlock Cluster: Freeze this cluster against manual edits and future AI runs.
- Lock All / Unlock All (Top Bar): Lock or unlock every cluster in the chapter at once.
- Cluster Selected (Top Bar): Group all checked faces into a new cluster.
- Delete Selected (Top Bar): Permanently delete all checked faces currently inside clusters.
- Unassigned ⋮ → Select All / Deselect All: Check or uncheck every unassigned face.
- Unassigned ⋮ → Remove Selected: Permanently delete checked unassigned faces.
4. Fine-Tune AI Settings (Optional)
Section titled “4. Fine-Tune AI Settings (Optional)”If AI is merging different characters together or splitting one character into too many small groups, click Advanced under Clustering Engine in the sidebar:
- Algorithm: Keep OPTICS Best (or OPTICS / HDBSCAN) for automatic grouping. Switch to DBSCAN only if you want to adjust the matching distance manually.
- Distance (eps) (shown for DBSCAN only): Controls how closely two faces must match (
0.05to0.50). Lower numbers make matching stricter; higher numbers group more varied angles and expressions together. - Min Faces (
2to10): Sets the minimum number of faces needed to create a cluster. Leave it at2to catch minor characters, or raise it so brief background characters stay in Unassigned.