
Write Page Overview
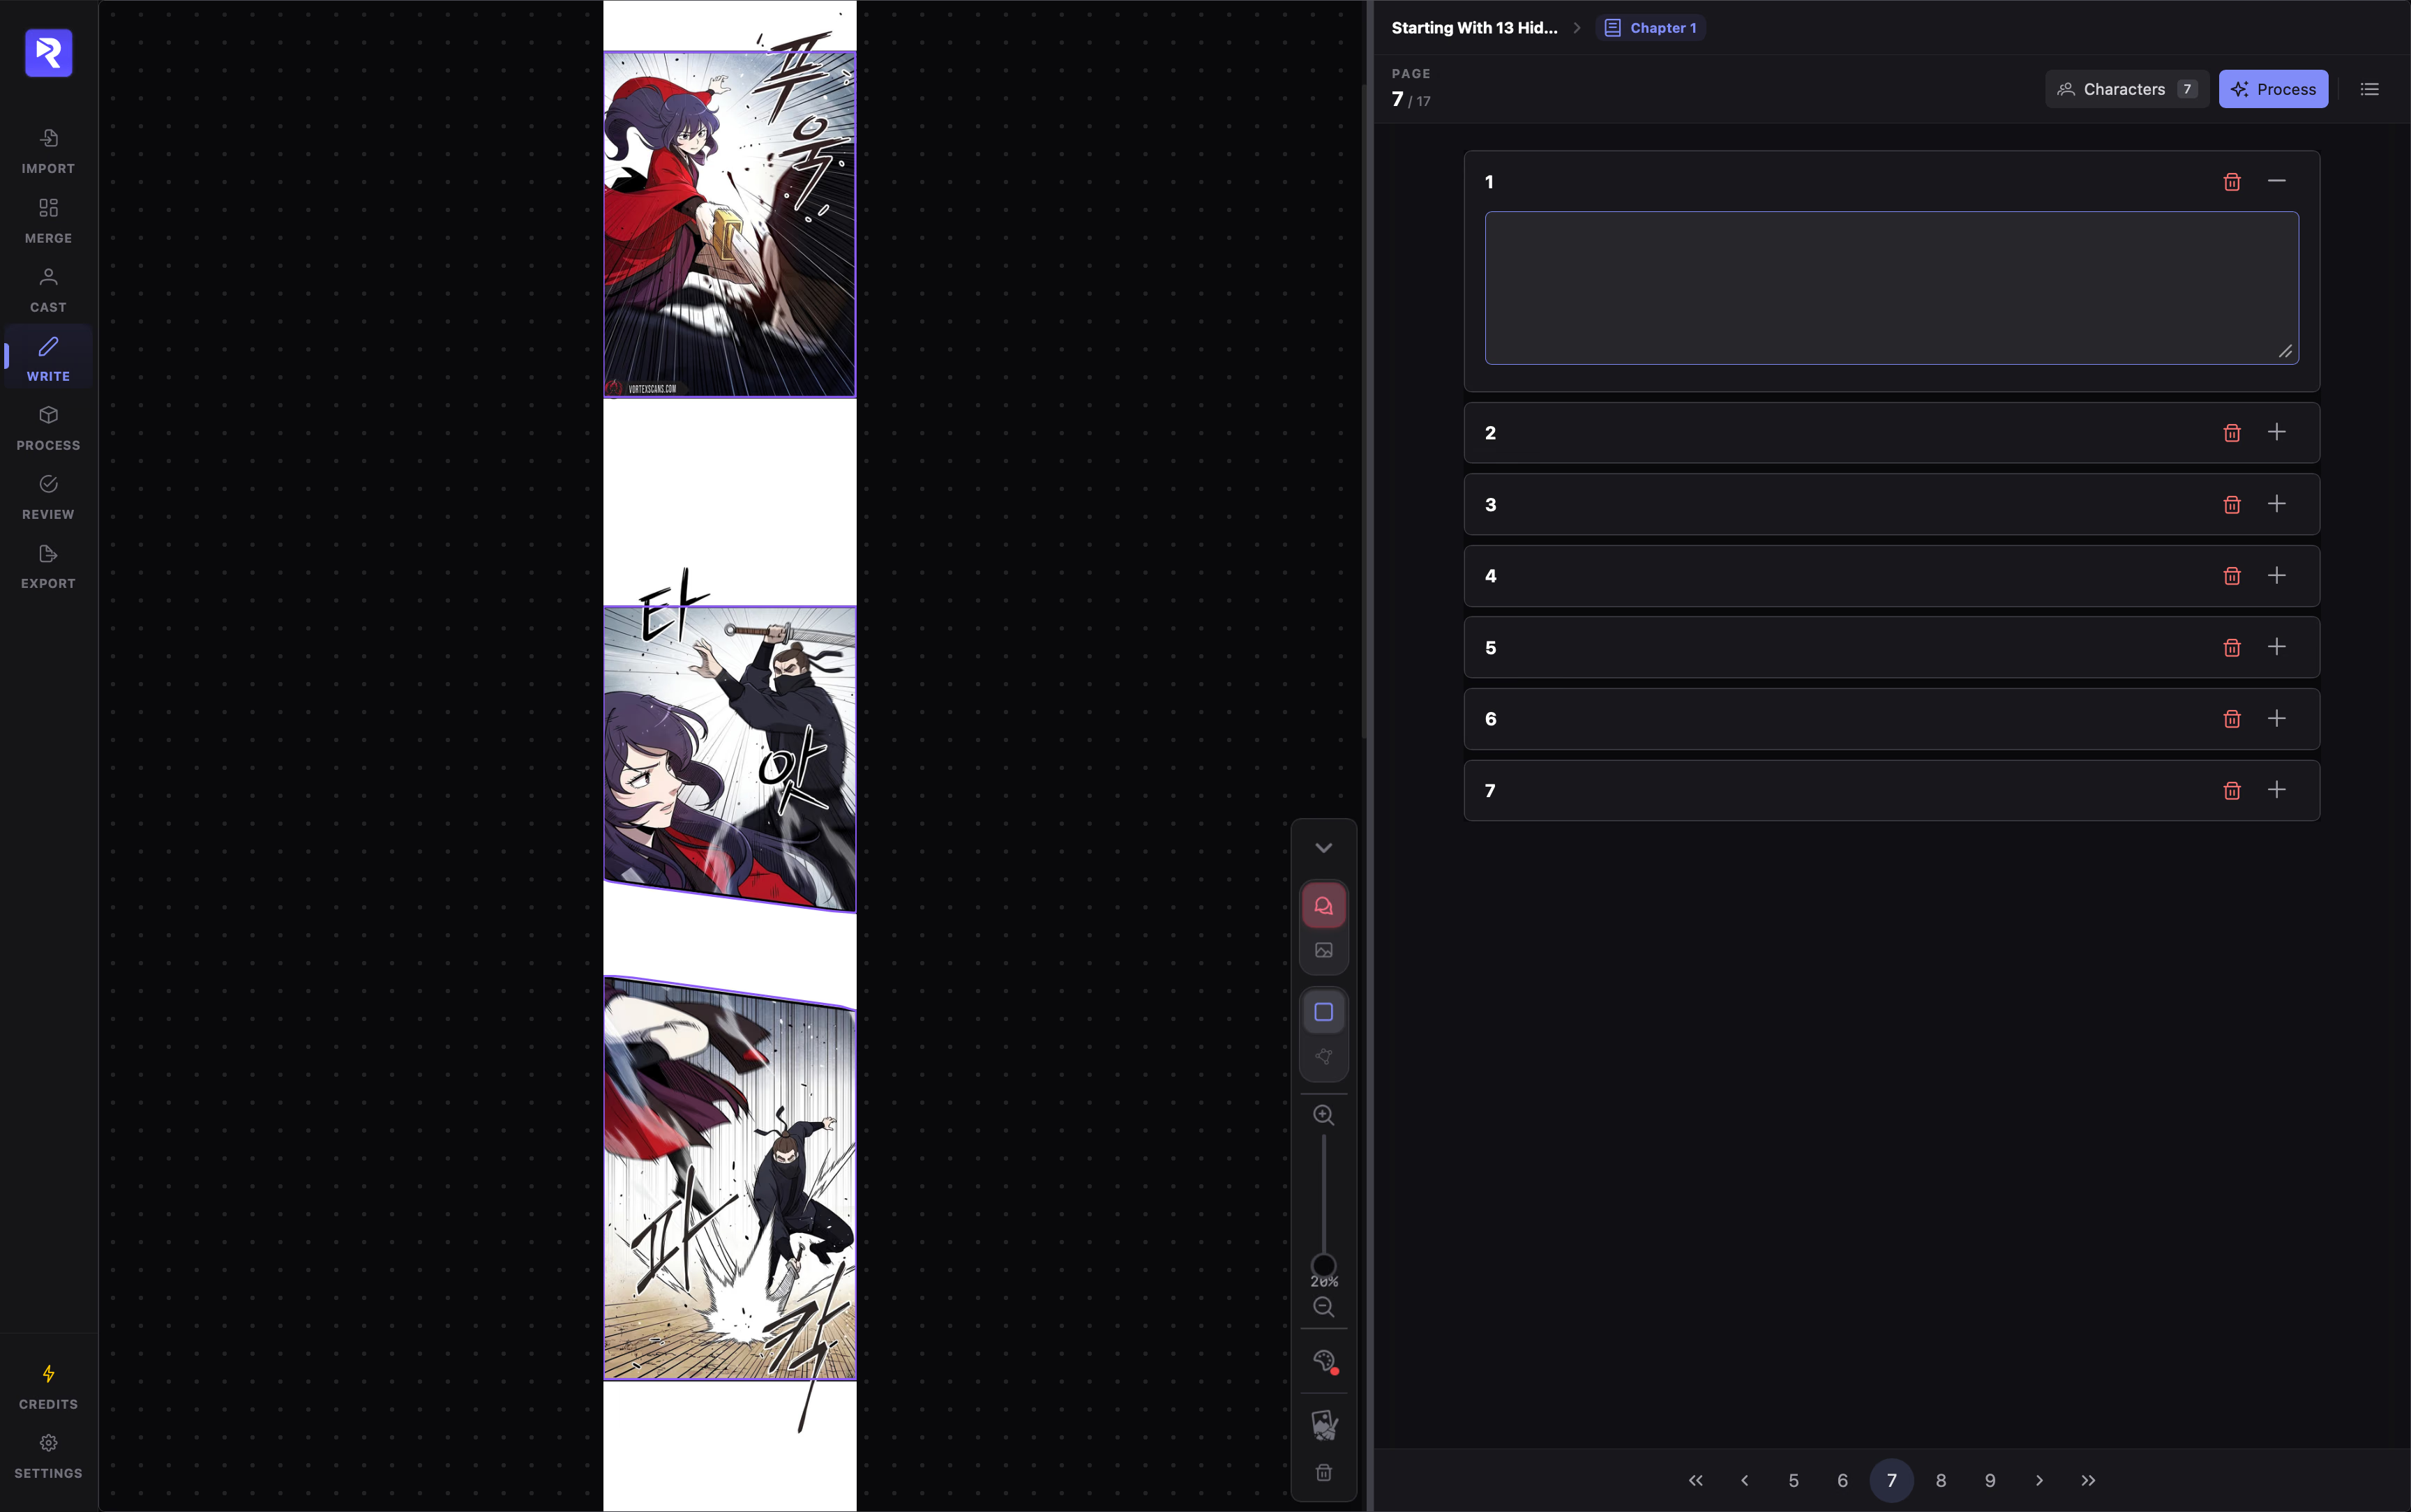
The Write workspace is where comic artwork meets your narration script. You view each page alongside its detected speech bubbles and panels, assign dialogue speakers, and review action descriptions.
Workspace Layout
Section titled “Workspace Layout”The screen is split into two synchronized panes with an adjustable divider:
Displays the active page image with overlaid detection boxes. Includes a collapsible floating dock to switch box types (Speech vs. Art), draw rectangles or polygons, adjust zoom, and customize box styling.
Displays an ordered list of script cards matching the boxes on the page. Speech cards let you pick the character speaker; art cards let you edit the visual panel description. Selecting a box on either pane automatically scrolls and focuses the other.
Top Toolbar Controls
Section titled “Top Toolbar Controls”The header above the script editor provides chapter context and primary actions:
- Breadcrumbs: Shows
Project Name > Current Chapterso you always know where you are. - Page Indicator: Displays your current position in the chapter (e.g.,
Page 3 / 24). - Characters: Opens the Character Management modal showing the project’s character count.
- Process: Opens the unified Process Document dialog to run Detection and OCR.
- Chapters (List icon): Opens the right-side chapter drawer.
Process Document (Detection & OCR)
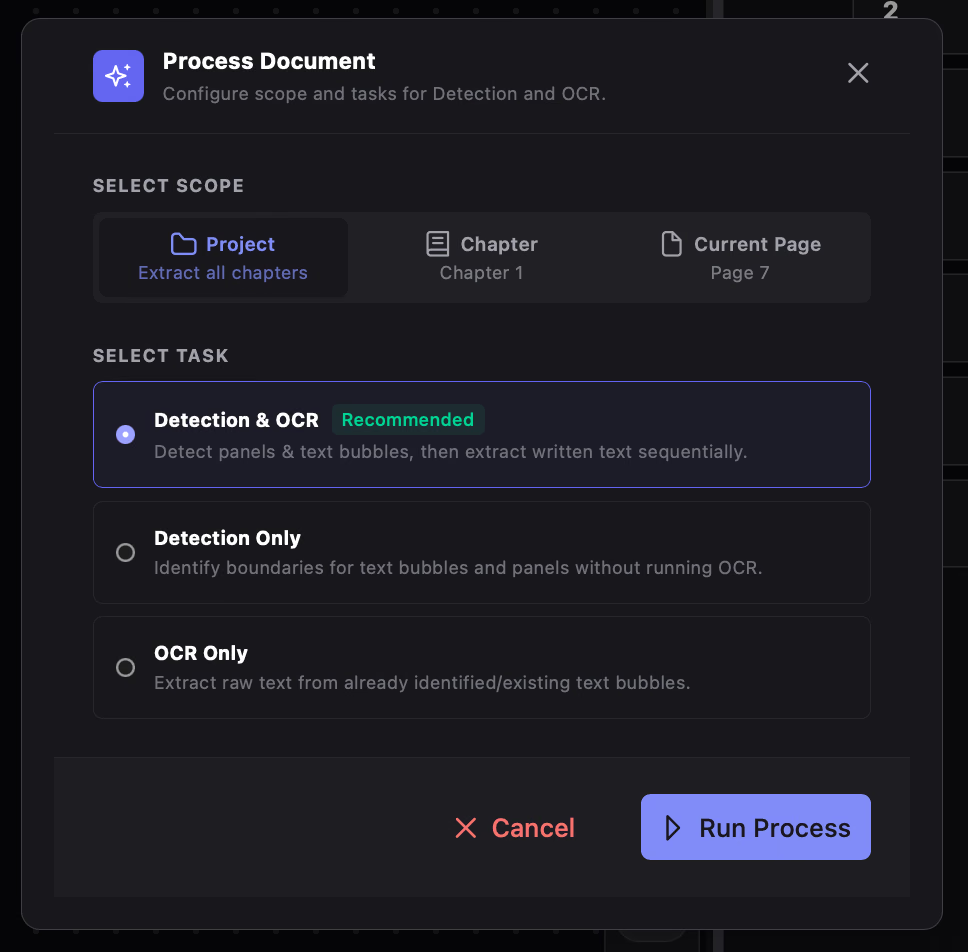
Section titled “Process Document (Detection & OCR)”Clicking Process opens the configurator modal where you choose your target scope and task:
1. Scope
Section titled “1. Scope”- Project: Processes every chapter in your manhwa.
- Chapter: Processes only the currently active chapter.
- Current Page: Processes only the single page visible in the canvas.
2. Task
Section titled “2. Task”- Detection & OCR (Recommended): Detects panel and speech boundaries first, then transcribes text inside speech bubbles sequentially.
- Detection Only: Runs computer vision models to detect speech balloons and art panels without transcribing text.
- OCR Only: Transcribes text inside speech boxes that were already detected or hand-drawn.
Chapter Drawer
Section titled “Chapter Drawer”Click the list icon in the top toolbar to open the Chapters Drawer.
Each chapter card displays:
- Chapter title and sequential order number.
- ART Progress Bar: Percentage of pages with detected panel boundaries.
- OCR Progress Bar: Percentage of pages with transcribed text.
- Clear Button (Eraser): Wipes all detection boxes and script text for that chapter while keeping the source images safe.
Click any chapter card to switch the editor to that chapter.
Keyboard Shortcuts
Section titled “Keyboard Shortcuts”The Write workspace includes keyboard shortcuts for rapid navigation and tagging:
| Shortcut | Action |
|---|---|
| Ctrl + → / ← | Next / Previous page |
| Ctrl + Shift + → / ← | Next / Previous chapter |
| Ctrl + ↑ / ↓ | Select previous / next box on page |
| Delete | Delete selected box |
| Alt + Q | Toggle box type (Speech vs. Art) |
| Alt + R / P | Switch drawing tool (Rectangle / Polygon) |
| Ctrl + / | Quick-assign last used character to active box |
| Ctrl + . | Open and focus character dropdown |
| Ctrl + ; | Clear character assignment from active box |
Next Steps
Section titled “Next Steps”Once your boxes, dialogue text, and speaker tags are reviewed across your chapters, proceed to the Process workspace to configure audio voices, crop ratios, and generate your narration videos.