
Export Overview
The Export workspace converts your reviewed comic panels, AI-generated narration, and voiceover audio into an industry-standard OpenTimelineIO (.otioz) project bundle.
Instead of manually cutting hundreds of image files and aligning audio clips on a video editing timeline, RecapSynth generates a timeline file complete with automated camera drift, panel transitions, and aligned speech tracks ready for final rendering in DaVinci Resolve, Adobe Premiere Pro, or Final Cut Pro.
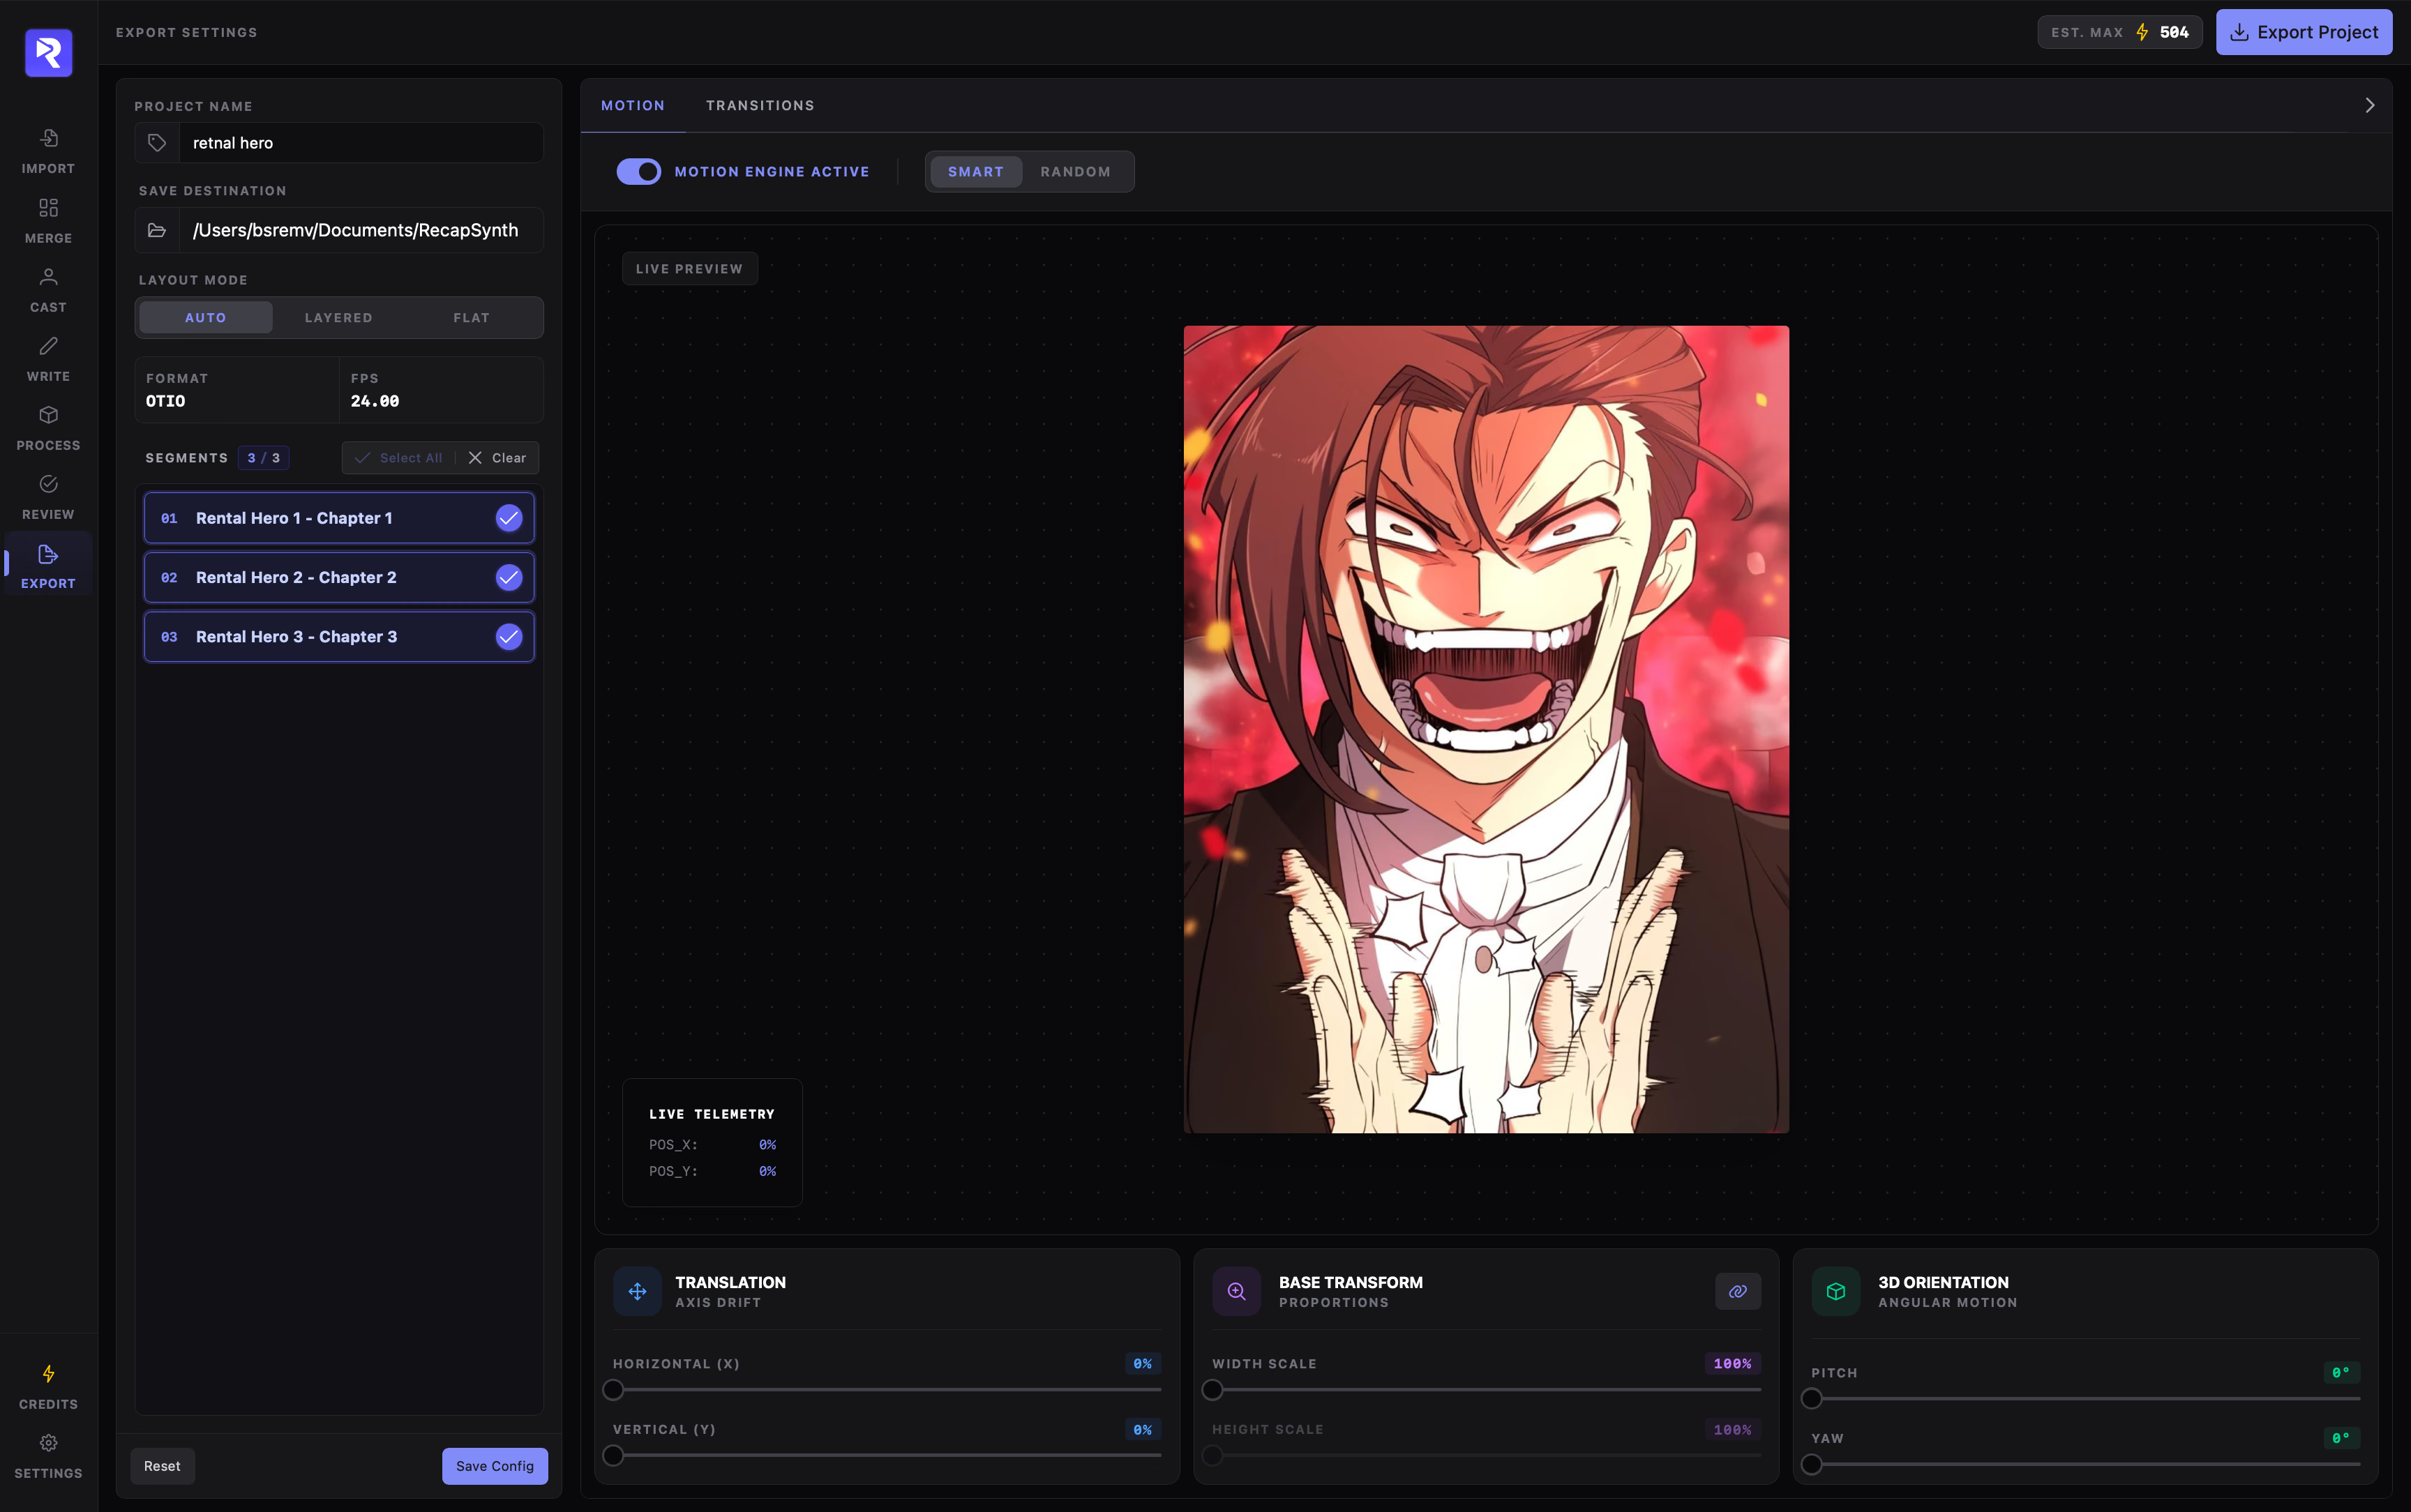
1 · Workspace Architecture
Section titled “1 · Workspace Architecture”The workspace is organized into three connected zones:
Calculates your page volume and animation costs, displays the credit estimate, and opens the export confirmation modal.
Specify project names, choose output directories, pick your track layout mode, and toggle which chapters to export.
Tune camera pans, zooms, and perspective tilts with live 3D telemetry, or configure optical dissolves and slides between scenes.
Layout Modes: Flat vs. Layered
Section titled “Layout Modes: Flat vs. Layered”The Layout Mode selector determines whether your manhwa panels are placed sequentially on a single track or stacked into a multi-panel comic book layout.

Inspects each chapter automatically. If multi-panel scenes exist from a condensed script, it enables layered multi-track output; otherwise, it uses flat sequential output.
Creates dedicated video tracks (Video 1, Video 2, etc.) for simultaneous panels, formatting them with balanced aspect ratios and uniform 32px gutters.
Maintains strict 1:1 single-track sequencing. Each panel receives its own dedicated time window matching the exact dialogue line.
How the Two Modes Compare
Section titled “How the Two Modes Compare”- Multiple Video Tracks: Video 1 through Video 4 hold simultaneous panels.
- Adaptive Layout Engine: Automatically evaluates row-grids, column-stacks, and tall-strip hybrids to fit widescreen canvases.
- Coordinated Motion: Camera pan, zoom, and tilt movements harmonize across adjacent panels without crossing gutters.
- Optical Transition Protection: Directional slide and push transitions are automatically converted to optical dissolves so panels stay cleanly inside their layout borders.
- Single Video Track: All panel clips reside strictly on Video 1.
- Full-Screen Focus: Every art crop fills the frame one after another.
- Direct Audio Alignment: Narration lines correspond directly to each individual image cut.
- All Transition Types Available: Slides, pushes, and dissolves move across the entire screen frame.
Project Settings & Segment Selection
Section titled “Project Settings & Segment Selection”The left configuration sidebar controls your export parameters and source material:
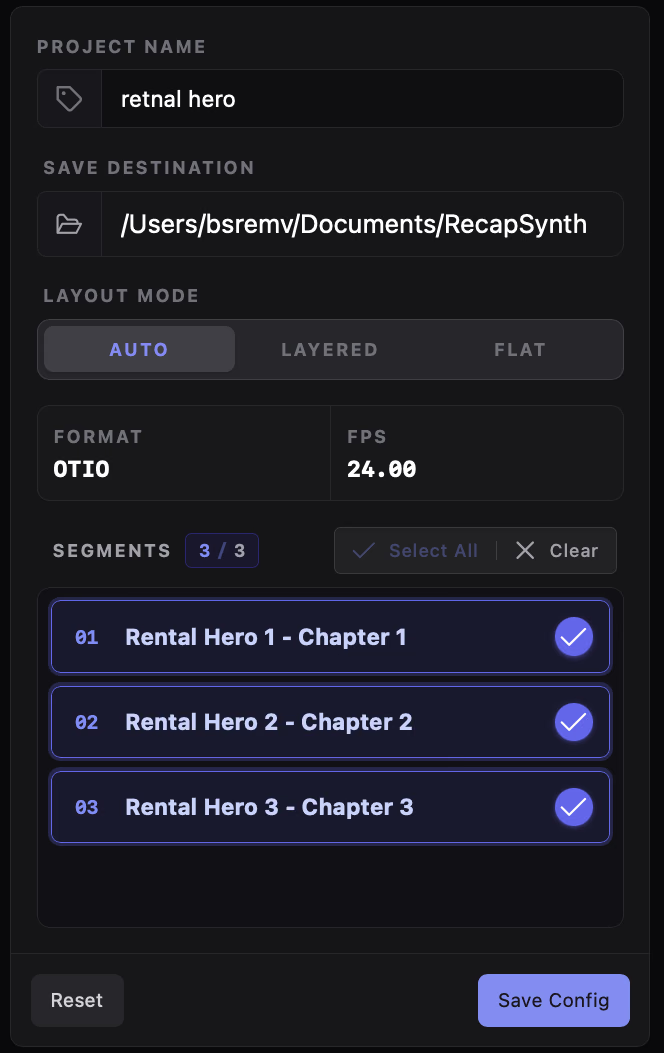
Defaults to your manhwa title. Click the folder icon to select any folder on your computer where the .otioz bundle should be created.
Timelines are generated at an industry-standard 24.00 FPS inside an OpenTimelineIO archive bundle.
Click chapter rows to toggle inclusion. Use Select All or Clear to quickly manage batches.
Want to make your current settings permanent? Click Save Config to set your default folder, layout mode, and animation parameters for all new projects.
Step-by-Step Export Workflow
Section titled “Step-by-Step Export Workflow”- 1
Confirm Scripts & Audio in Review Ensure all chapters have completed voiceover audio and verified SRT word timing in the Review step. Export references these synchronized assets directly.
- 2
Select Chapters & Layout Mode Pick your target chapters in the Segments list. For multi-panel condensed scripts, choose Layered (or leave on Auto).
- 3
Fine-Tune Motion & Transitions Use the right-hand tabs to configure camera drift, zoom scale, 3D perspective orientation, and transition blending.
- 4
Export & Reveal Click Export Project in the top header, confirm in the dialog prompt, and wait for the compilation to complete.
Compilation & Export Complete
Section titled “Compilation & Export Complete”While RecapSynth builds the timeline, a progress indicator confirms each pipeline stage:
- Synchronizing dialogue timestamps with voiceover audio waveforms.
- Running the AI visual saliency model to calculate focal points on character art.
- Calculating DaVinci Resolve Bezier curves for pan, tilt, zoom, and 3D angle drift.
- Packaging media references and audio stems into a
.otiozarchive.
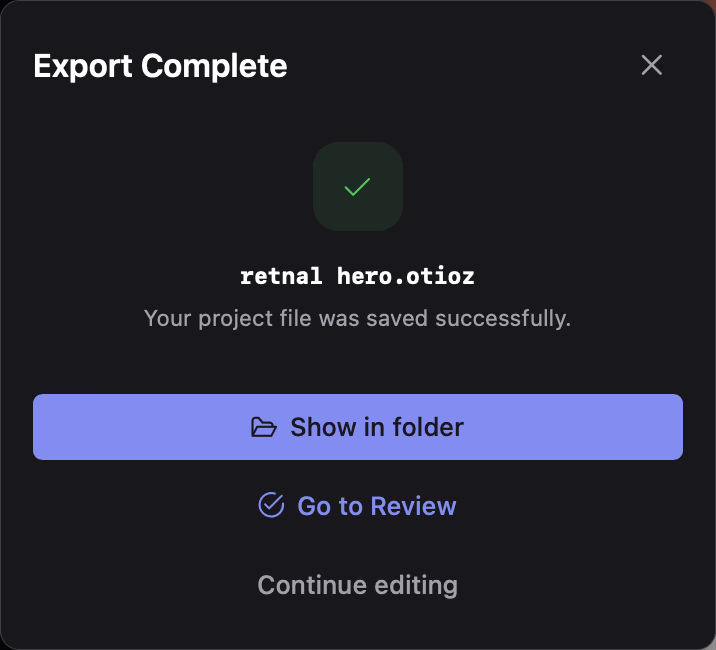
When finished, the success modal offers three direct actions:
- Show in folder: Reveals the generated
.otiozfile in your desktop file manager. - Go to Review: Jumps directly to the Review workspace if you wish to adjust dialogue lines or audio timing.
- Continue editing: Closes the dialog so you can adjust settings and run another export.
Working with Video Editors
Section titled “Working with Video Editors”DR
Resolve natively opens .otioz bundles. All transform keyframes (Pan, Tilt, Zoom, Pitch, Yaw) load directly into Resolve’s Inspector with editable Bezier curves.
PR
Open the timeline directly using standard OTIO interchange tools, or import into DaVinci Resolve and roundtrip as FCPXML / Premiere XML.