Skip to content

Drawing Boxes and Annotations

On the Write page, boxes (annotations) define the regions of each comic page that the pipeline cares about. You draw and adjust them on the interactive canvas in the left panel.

There are two primary categories of boxes: Speech (dialogue, captions, and text balloons to be read by OCR) and Art (illustration panels that will receive action descriptions).

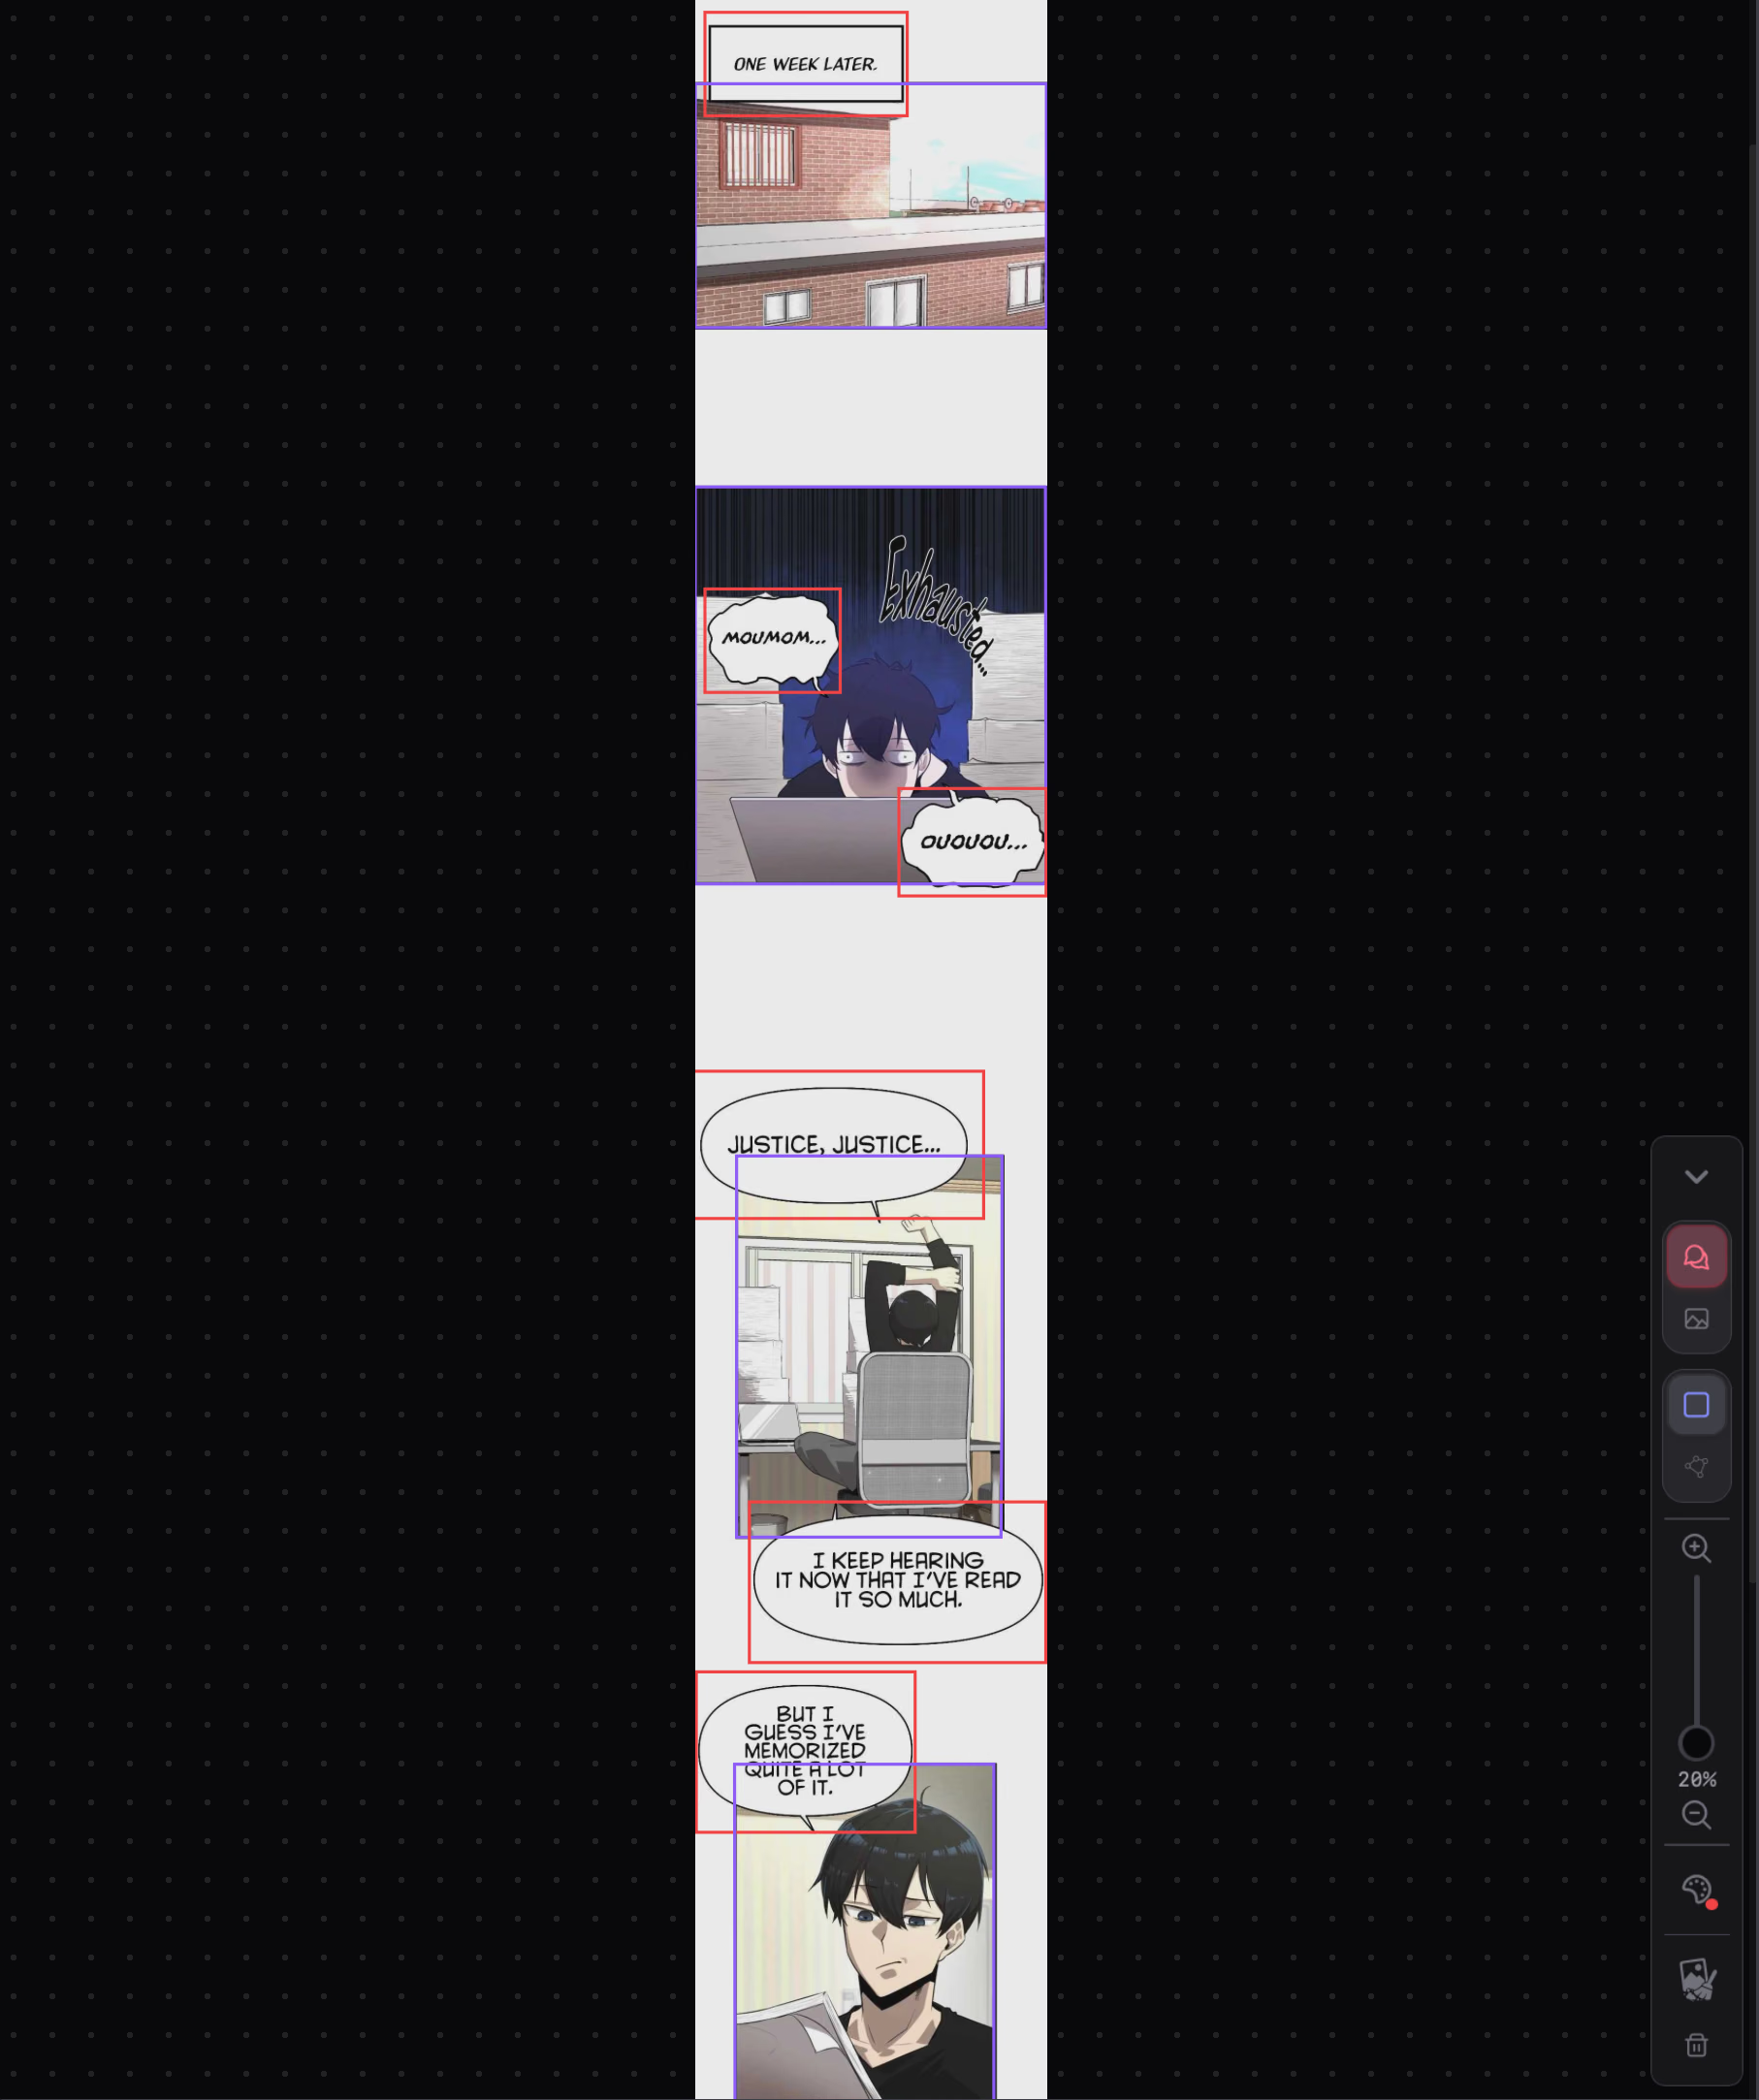
Interactive page canvas showing speech boxes in coral and art boxes in indigo
The interactive canvas: speech balloons outlined in coral red, art panels outlined in indigo, and drawing controls in the floating dock.

Every annotation has a Category (which dictates whether OCR runs on it) and a Shape (which dictates how coordinates are saved in the database).

Speech Box (Text / Dialogue)

Used for dialogue bubbles, shout balloons, and rectangular narrator captions. Targeted by the OCR engine to transcribe dialogue text.

Art Box (Illustration Panel)

Used for action panels, character close-ups, and background scenes. Skipped by OCR. Used by Vision AI to generate visual action descriptions.

Rectangle Shape (Alt+R)

Click and drag across the page to create a standard 4-corner bounding box. Best for regular panels, clean bubbles, and rectangular captions.

Polygon Shape (Alt+P)

Click each corner point around complex shapes and double-click to close. Best for slanted panels, overlapping action cuts, and irregular bubbles.


The collapsible dock anchored to the bottom-right corner of the canvas gives you quick access to all drawing tools, zoom levels, and page actions.

Floating toolbar showing box type toggles, shape toggles, vertical zoom slider, and box style popover
Floating dock

Toolbar Controls

  • Collapse / ExpandChevron

    Toggles between a minimal icon and the full controls bar. Your preference is saved across sessions.

  • Box Type SegmentAlt+Q

    Switch between Speech (dialogue bubble icon) and Art (image icon).

  • Shape SegmentAlt+R / Alt+P

    Switch between Rectangle (square icon) and Polygon (vertex icon).

  • Vertical Zoom SliderCtrl+Wheel

    Drag between 20% and 100%, or hold Ctrl while scrolling.

  • Box Style PalettePalette icon

    Opens the flyout panel to configure independent colors, border widths (1 to 6px), and fill opacity (0% to 80%) for Speech vs. Art boxes.

  • Clear BoxesEraser icon

    Wipes all detection boxes and script text on this page without deleting the image.

  • Delete PageTrash icon

    Permanently removes the entire page image from the chapter.


  1. 1
    Draw a Box

    Select your tool and draw over the panel or speech bubble. A matching script card is instantly added to the right panel, sorted in top-to-bottom reading order.

  2. 2
    Move or Resize

    Click any box on the canvas to select it. Drag the center to move it, or pull its perimeter corner handles to resize. Coordinates update automatically.

  3. 3
    Step Through Boxes

    Press Ctrl+↑ and Ctrl+↓ to cycle through every box on the page sequentially without using your mouse.


Right-click any box on the canvas to open the quick-edit floating menu:

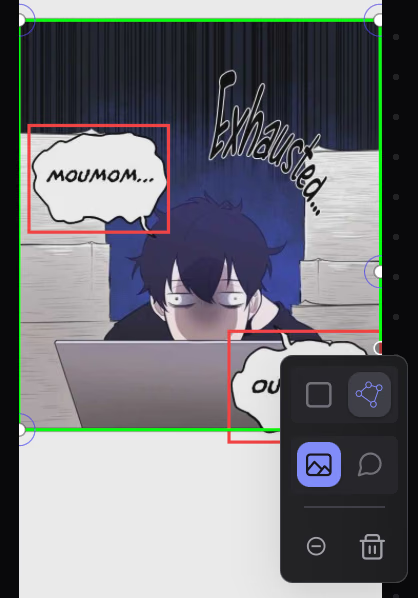
Right-click context menu on a bounding box showing shape toggle, category toggle, remove vertex, and delete
Right-click context menu: change shape, switch between Speech and Art, remove polygon vertices, or delete.

Context Menu Actions

  • Convert ShapeRectangle / Polygon

    Click the rectangle or polygon icon to convert the existing box between geometric types.

  • Change CategorySpeech / Art

    Switch a box from Art (image icon) to Speech (comment bubble icon) if an AI detection mislabeled a dialogue balloon as art.

  • Remove Closest VertexPolygon only

    Removes the point closest to where you right-clicked, letting you simplify polygons without deleting them (polygons require a minimum of 3 vertices).

  • Delete Annotation
    Trash iconDelete

    Deletes the box from the canvas and removes its script card on the right. You can also select the box and press Delete.