
Name Assignment
Once you have gathered your character faces into Character Groups, Name Assignment helps you give each group their actual name.
You can let AI read your comic dialogue to discover names and guess which face belongs to whom, check the exact comic panels to make sure it guessed correctly, or simply drag and drop names by hand.
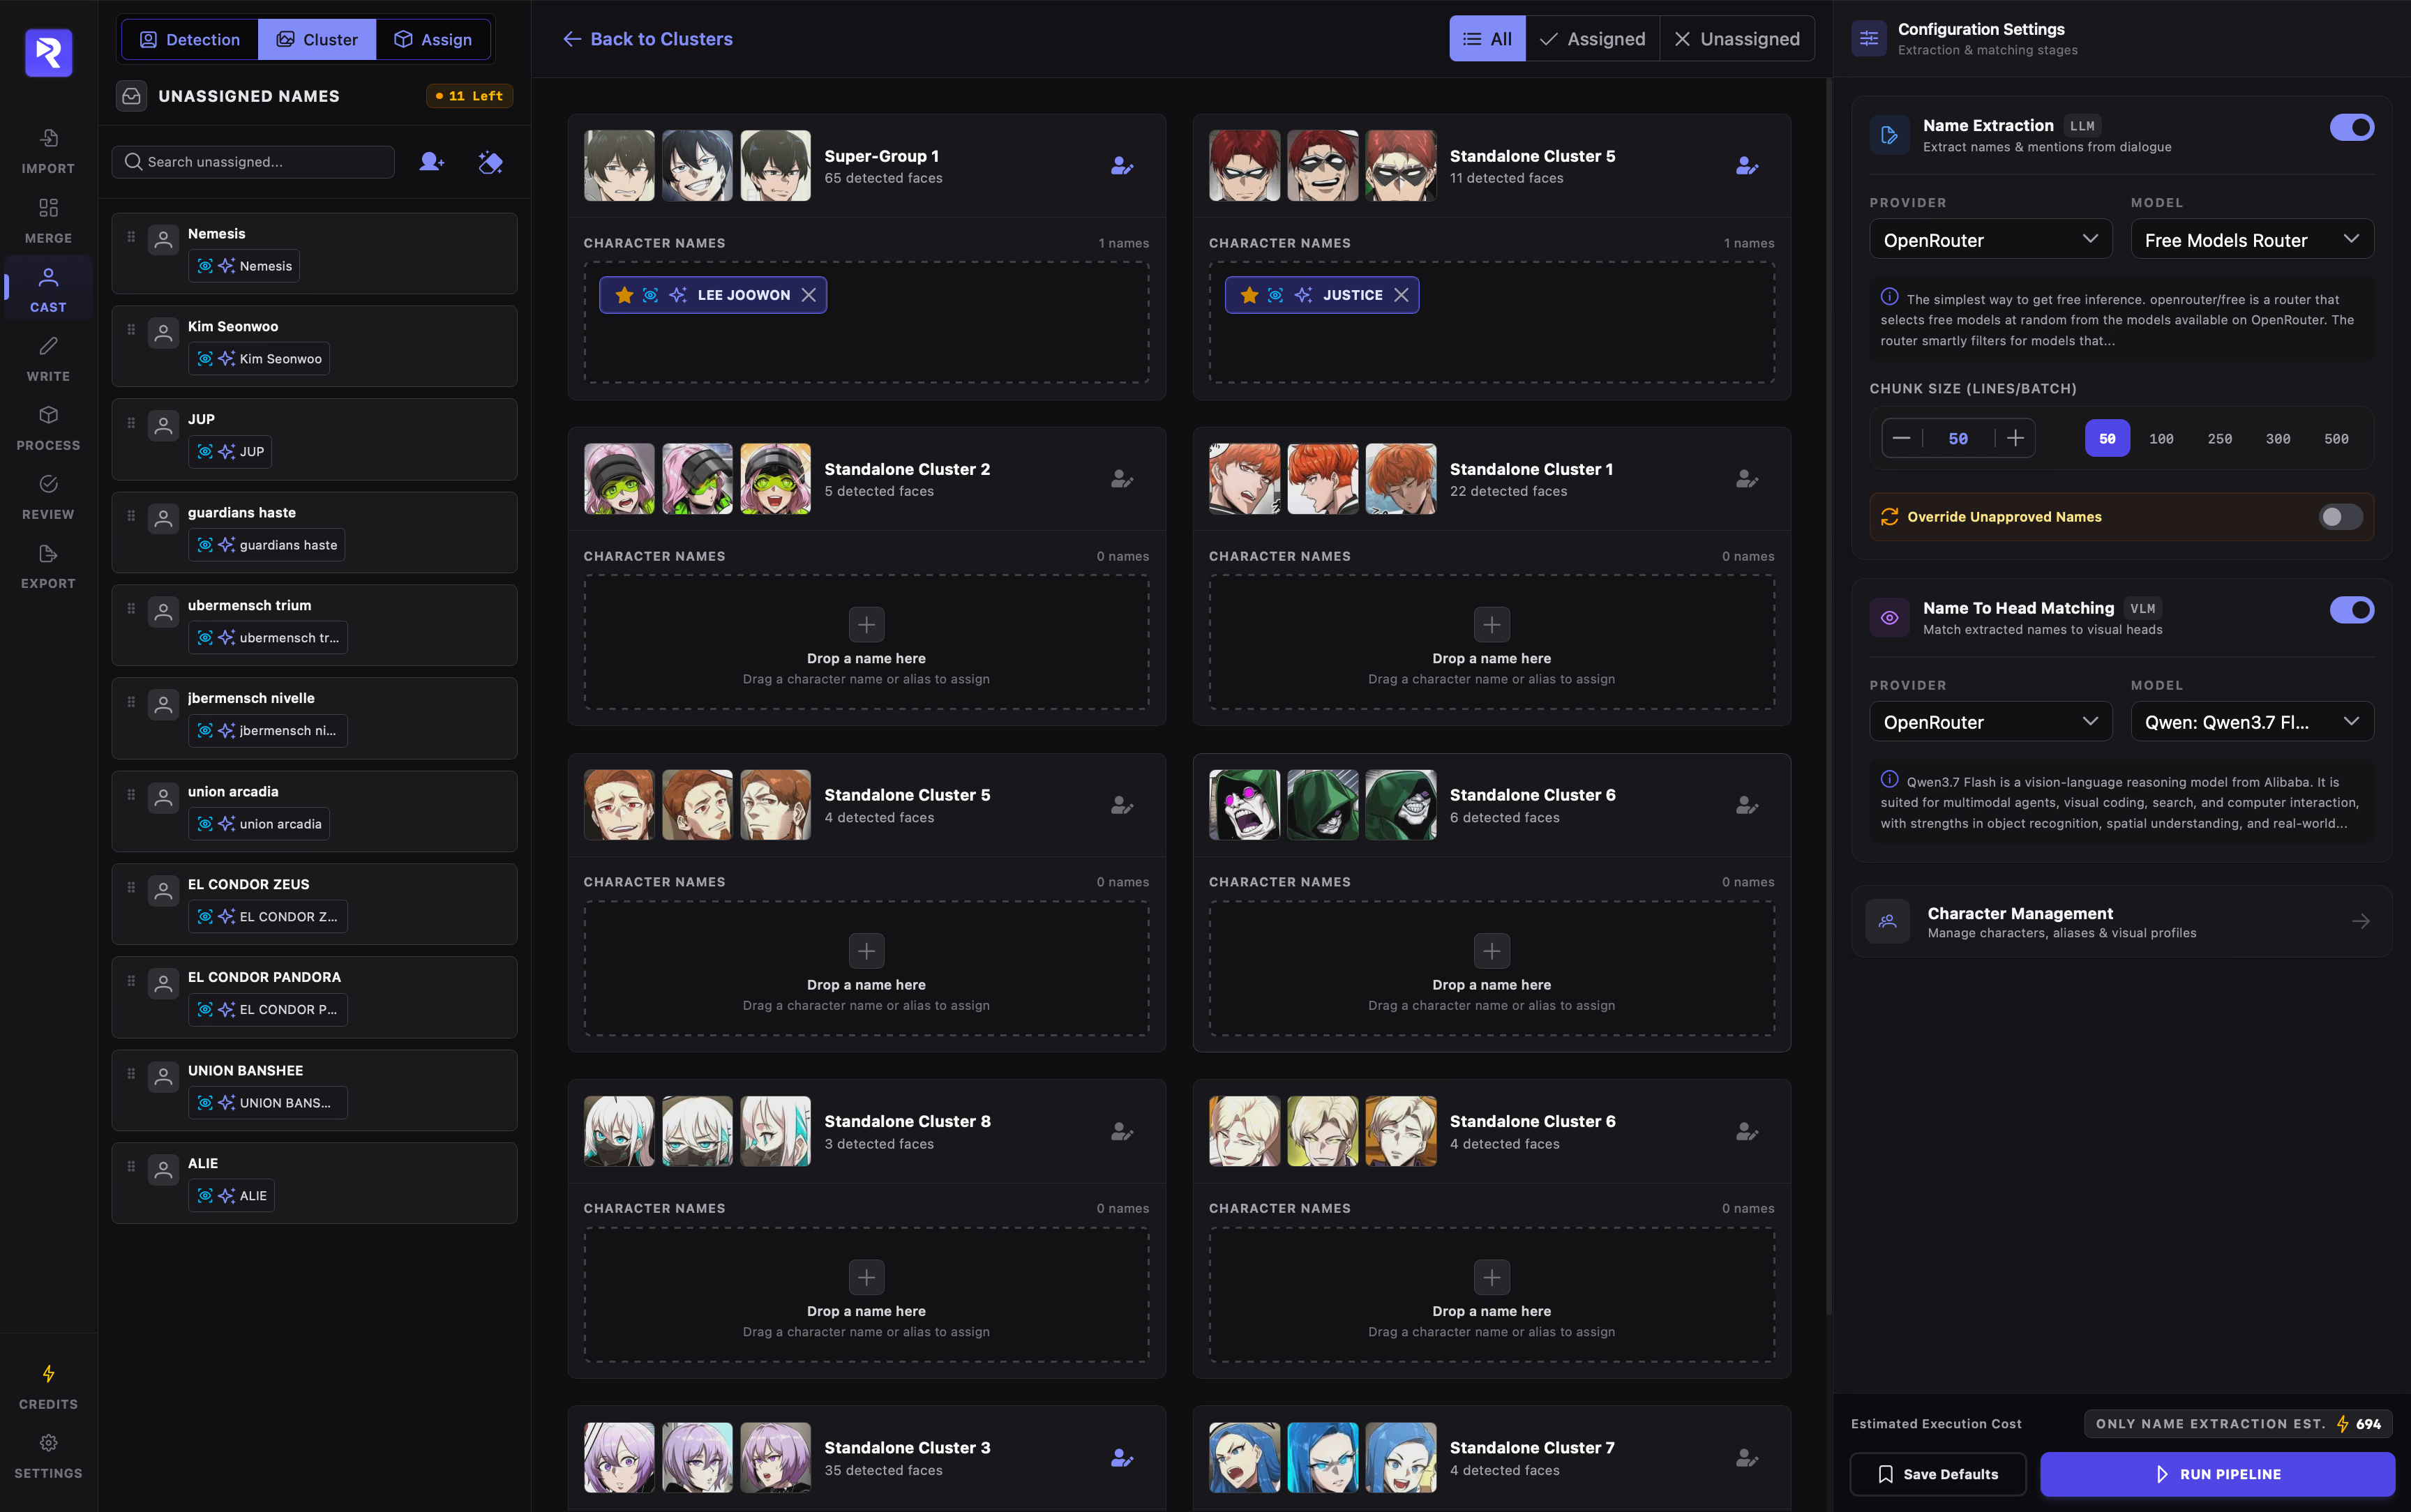
A list of all character names and nicknames found in the story that haven’t been linked to a face yet.
Your visual face cards. Each card displays assigned names and dashed boxes with AI suggestions waiting for your approval.
Where you run the AI assistant to read dialogue, suggest matches, or open your full character roster.
1. Let AI Find Names & Match Faces
Section titled “1. Let AI Find Names & Match Faces”Instead of typing out every character by hand, use the Configuration Settings panel on the right. AI can read your comic’s dialogue lines and connect names to the right faces in two steps. You can run both steps together or just one at a time.
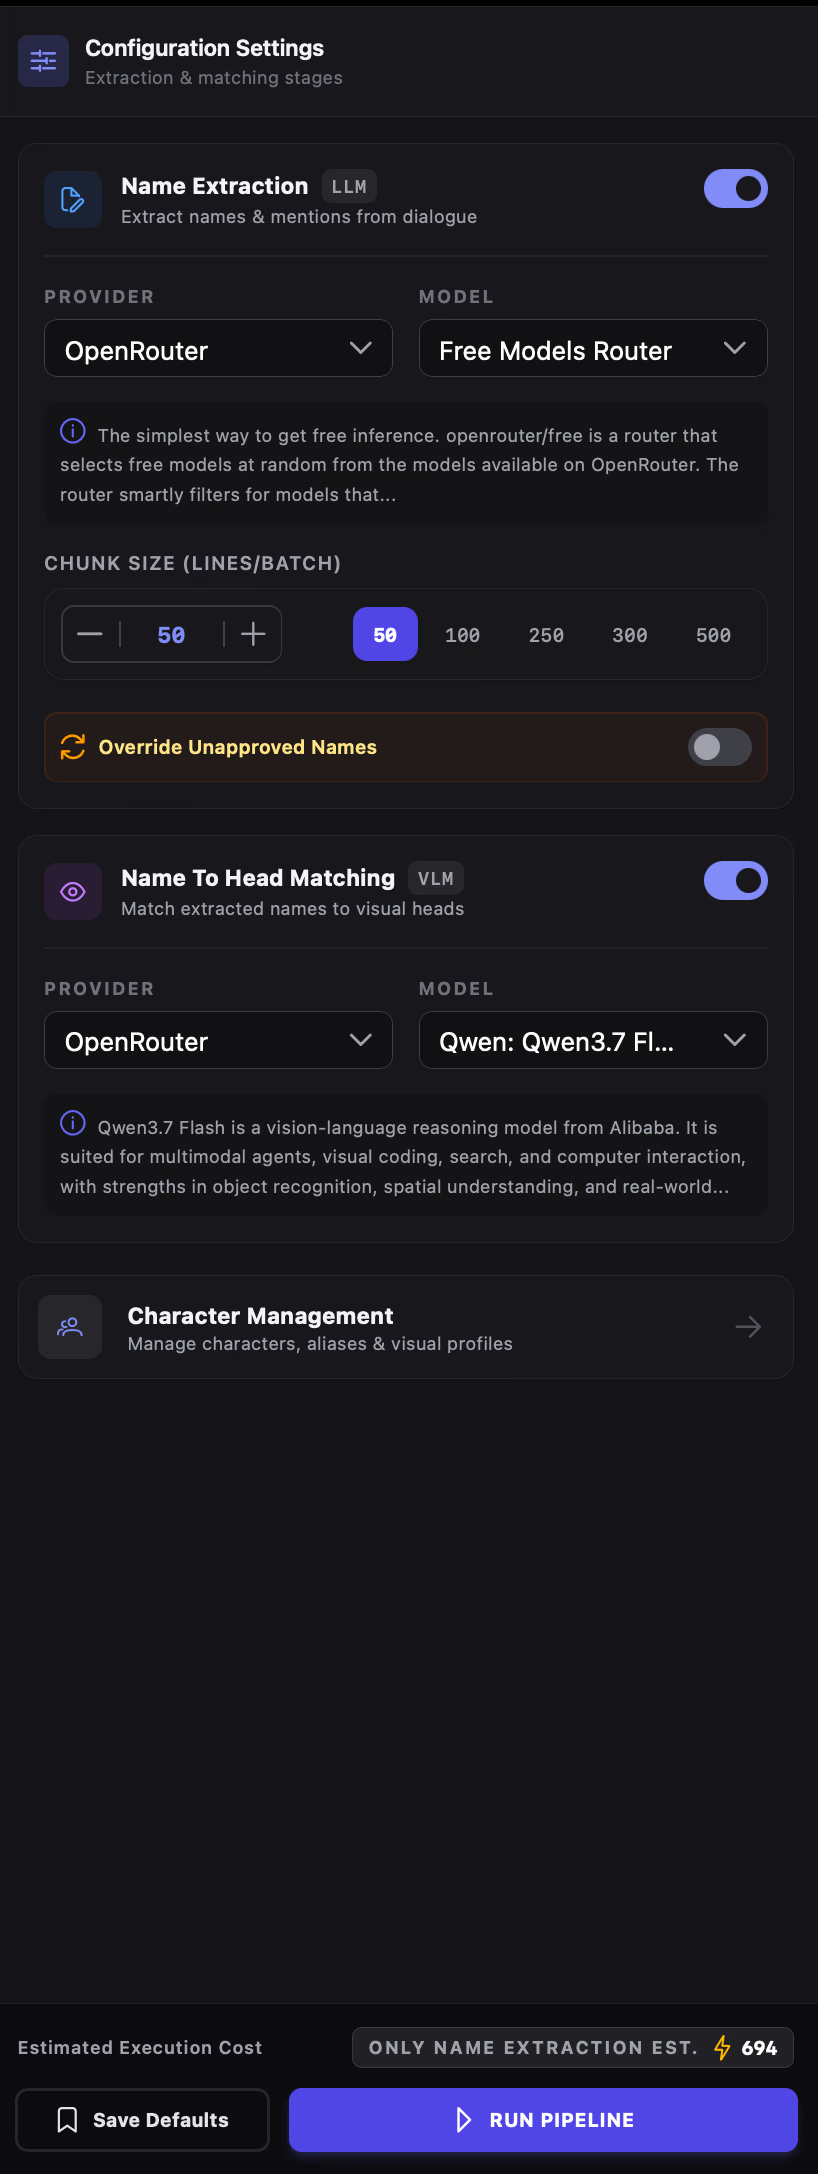
A text AI reads through all comic speech bubbles to discover character names, alternate nicknames, and every place they are mentioned.
A vision AI looks at the panels surrounding each name mention to suggest which face belongs to that name, filling in profile details like gender and description.
Helpful Settings Explained
Section titled “Helpful Settings Explained”- Provider & Model: Choose which AI service to use for reading text and viewing comic panels. If you see a Missing API Key warning, you need to add your service key in app Settings first.
- Chunk Size (Lines/Batch): How many speech bubbles the AI reads in one go (presets range from
50to500, up to5000).- Larger chunks: Gives the AI more story context at once.
- Smaller chunks: Slower, but safer if your AI model has stricter request limits.
- Override Unapproved Names:
- Turned OFF: The AI only scans newly added dialogue that hasn’t been processed yet.
- Turned ON: The AI re-reads the entire project from scratch and replaces any names you haven’t manually locked in.
- Save Defaults: Remembers your chosen models and settings so you don’t have to re-select them next time.
Click Run Pipeline to begin. A live progress window shows what the AI is doing, and you can stop it safely at any moment by clicking cancel.
2. Review AI Suggestions & Inspect Evidence
Section titled “2. Review AI Suggestions & Inspect Evidence”The AI never forces a name onto a character without your permission. Instead, its guesses appear inside a dashed AI Suggestions area on the character’s card.
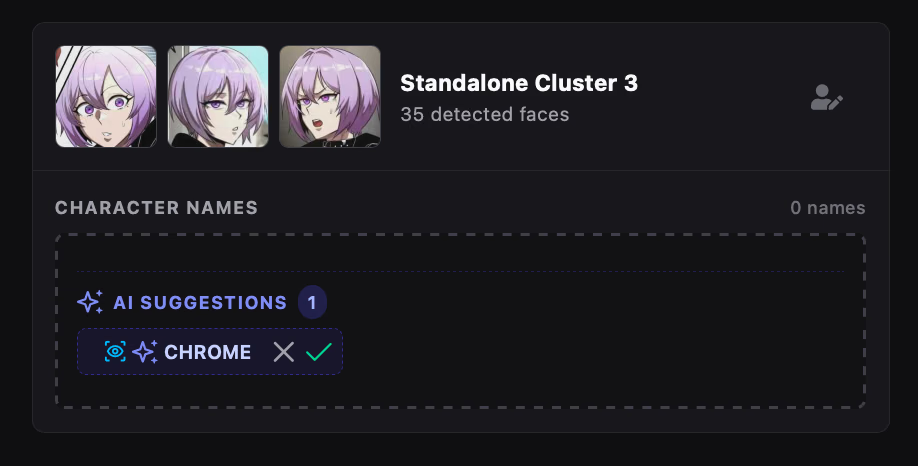
- Approve (
✓): Confirms the suggestion. The name moves into the permanent Character names list on that group. - Reject (
✕): Dismisses the guess. The name returns to the Unassigned Names list on the left so you can use it elsewhere. - Drag a suggestion: If the AI guessed the right character but attached it to the wrong face, simply drag the suggested name tag directly onto the correct card.
Double-Check Proof with the Evidence Visualizer
Section titled “Double-Check Proof with the Evidence Visualizer”Not sure why the AI thinks a character has that name? Click the blue target/eye icon next to any name tag to open the Alias Evidence Visualizer. This shows you the exact comic page and bubble where the name came from.
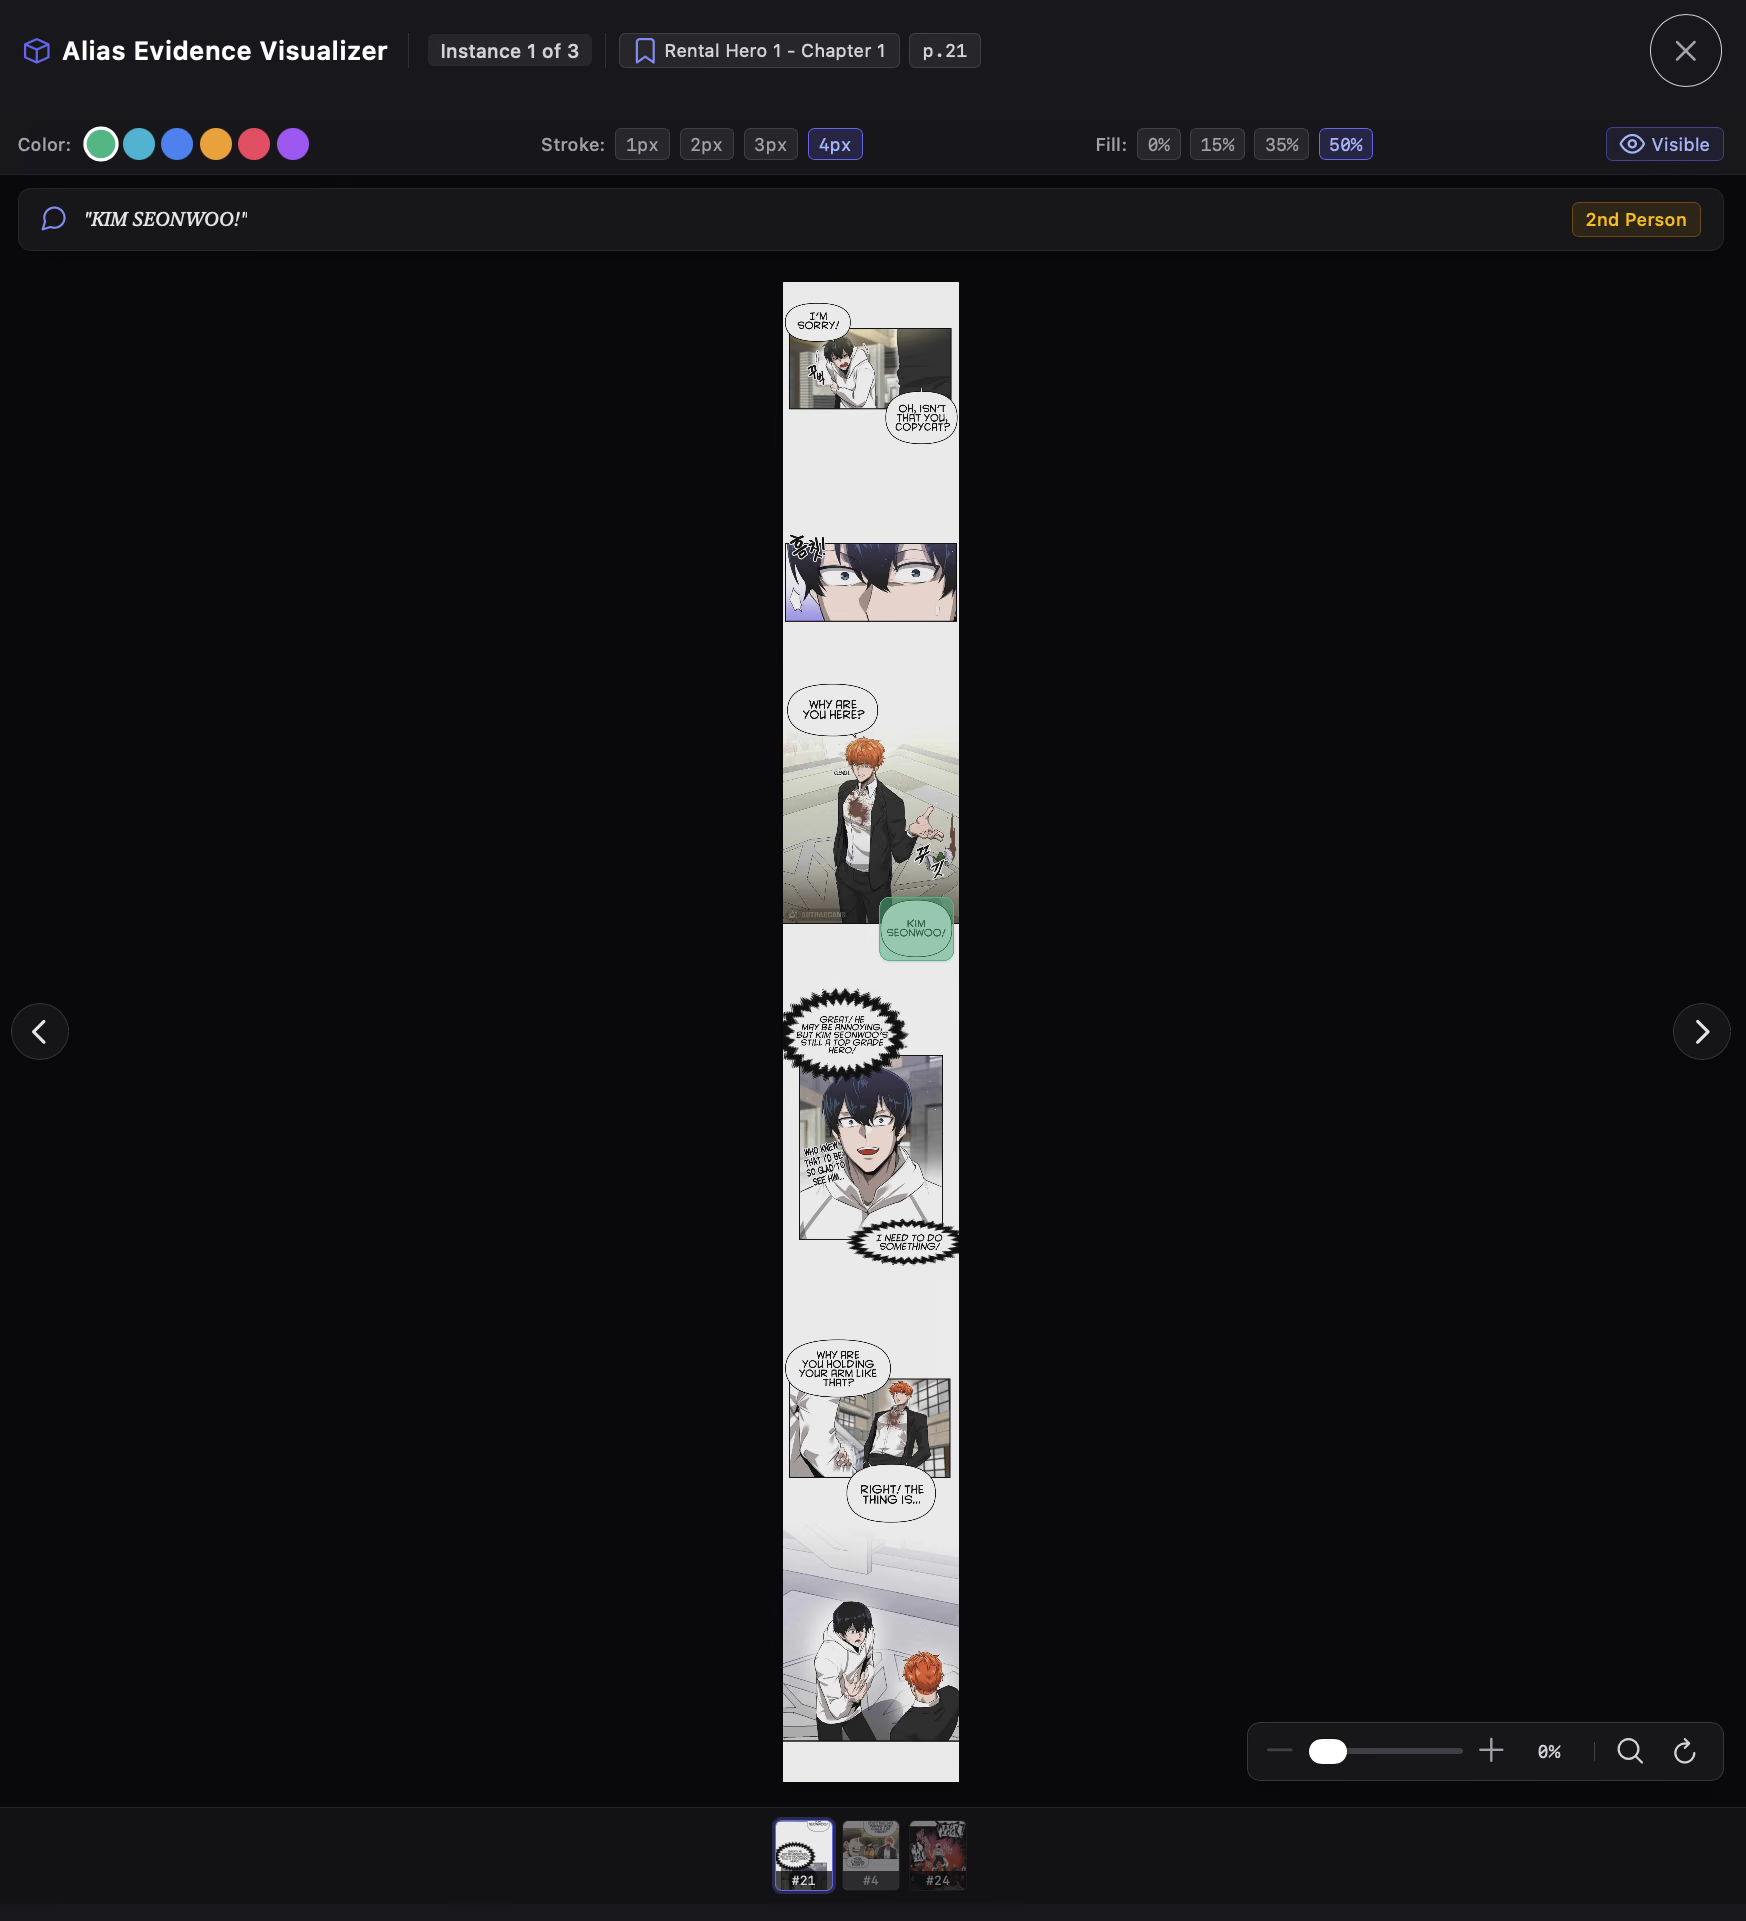
- See the context: The header displays the exact quote, chapter number, page number, and how the name was used (such as someone speaking about themselves in
1st Person, someone introducing them via3rd Person ID, or calling out to them via2nd Person). - Flip through mentions: Use the left/right arrow buttons, the arrow keys on your keyboard (← / →), or click any page in the bottom thumbnail strip to see other places this name appears.
- Zoom & pan: Scroll your mouse wheel or move the zoom slider at the bottom right (
0%shows the whole page, while100%zooms straight into the speech bubble). Click and drag to pan around, or customize the highlight box color and border style from the top toolbar.
3. Assign, Unassign & Organize Manually
Section titled “3. Assign, Unassign & Organize Manually”You always have full manual control. You can drag names onto cards yourself, create missing characters, or clean up extra names.
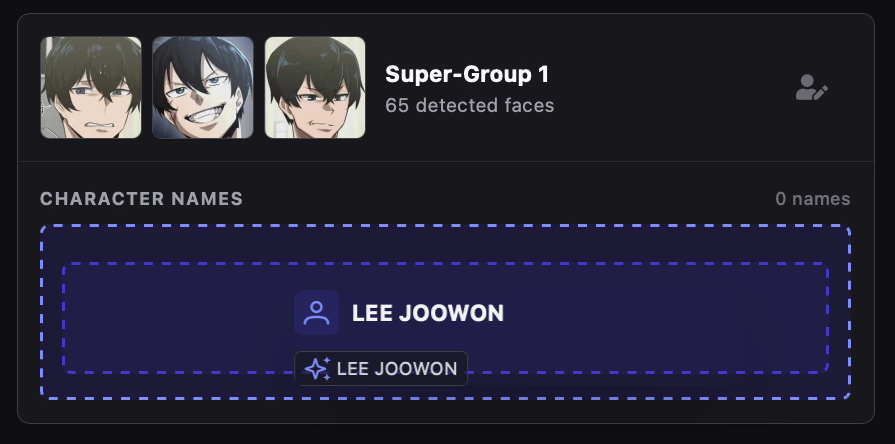
- Assign a name: Drag any character card from the left panel into the drop zone on a Character Group card.
- Unassign a name: Click the × button on any assigned name chip, or drag it back over to the left sidebar.
- Filter your view: Use the All, Assigned, and Unassigned buttons at the top of the center board to quickly spot faces that still need names.
- Search or create: Filter names using the search bar on the left, or click the Create Character icon next to search to manually add a new name.
- Edit details: Hover over an unassigned name to edit or delete it, or click the Edit Cluster Character icon on a group’s header to update its profile.
- Clean up leftover AI names: Click the Magic Eraser icon next to the search bar to delete all unassigned AI-generated names with a single click.
- Full cast manager: Click Character Management in the right panel to open a dedicated list of all characters, aliases, and bios in your project.